
Hi There...
We moved to a new cozy Home.. Please visit us at http://www.cooklikemom.net/
Thank You.
Monday, 14 November 2011
Tuesday, 8 November 2011
Dum Aloo
Dum Aloo is one of the exotic dish I relish.... I feel that it sometimes gets lost in the menu of a restaurant among all other fancy names of the dishes..
Potoates are such simple and can I say down to earth , that many take them lightly, one of my friend used to say, why does any one want to eat potatoes in a restaurant :-)
And talking of Dum Aloo, there are many ways to prepare it, Kashmiri Dum Aloo, Banarasi Dum Aloo, Punjabi Dum Aloo.... Some use Yougurt, some use coconut milk and some use cream.
Today it is about Kashmiri Dum Aloo...Rich Creamy Baby Potatoes in Yougurt Based Sauce....
I am not sure if it is authentic Kashmiri dish, because I changed it according to our taste buds...
What You Need :
Baby Potatoes : 15, approx
Red chilli powder : 1 tsp
Salt : to taste
Oil : For frying (See Notes)
Wash Baby Potatoes and pat dry. Peel them, and mix them with salt, chilli powder and 1 Tbsp of oil.
Heat oil in a Kadai, and fry the Potatoes till golden brown
Grind to Paste:
Onion : 1 Large, chopped
Tomato : 1, chopped
Ginger Garlic Paste : 2 Tbsp
Green Chillies : 3,chopped, increase or decrease according to your taste.
Heat 1 Tbsp of oil in a pan, and add all the ingredients listed above and fry till it gives nice smell and onions turn translucent and tomatoes are mushy.
Cool and blend to paste.
Grind to Powder:
Coriander Seeds : 2 Tbsp
Fennel Seeds: 2 Tbsp
Cardamom seeds : 1 tsp
Dry roast the above ingredients.
Cool and grind to fine powder.
Grind to Paste:
Almonds : 6-7, soaked in warm milk
Remove the skin of the almonds.
Grind to fine paste along with the milk.
Whole Garam Masala :
Shah Jeera : 1 tsp
Star Anise : 1
Cloves : 5
Cinnamon : 2 inch stick
Bay leaves : 3
Kitchen King or Garam Masala : 1 Tbsp
Curd : 250 gms, beat lightly with fork till smooth
Salt : to taste
Turmeric : 1 tsp
Butter : 2 Tbsp
Water : 1 cup
- Heat 2 Tbsps of Butter in a wide pan.
- Add all the ingredients listed under whole garam masala.
- Once they start crackling, add the onion and tomato paste.
- Add Turmeric.
- Fry for a min or two.
- Now add the prepared masala powder. Fry till the oil separates.
- Now add curd and mix well.
- Add the potatoes, kitchen king/garam masala powder, along with 1 cup of water.
- Close the lid and let it simmer on low heat for about 15 to 20 mins.
- Add in the almond paste and mix well. adjust salt.
- Simmer for 5 more mins.
- Turn off heat , and finally add coriander leaves.
- Serve hot with Roti's, Naan's or Pulao
Mom's Tips :
You do not have baby potatoes, you can even use normal potatoes with are quartered.
Instead of deep frying, you can just heat one Tbsp of oil and shallow fry. OR you can even used boiled potatoes OR you can roast potatoes in oven till golden brown.
If the gravy gets thick, you can add half cup more water, but remember to adjust salt.
Thursday, 3 November 2011
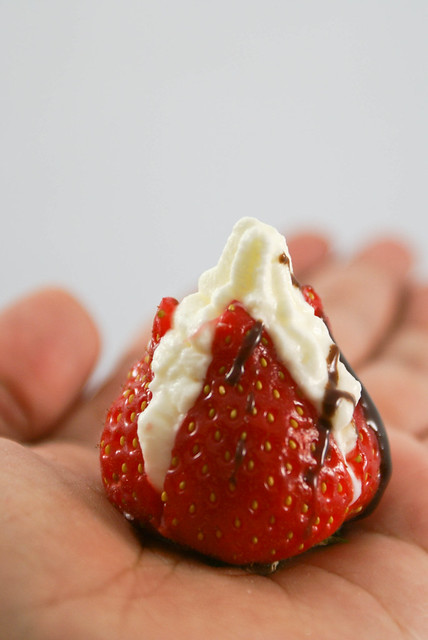
Strawberries and Cream

Berries.. in particular Strawberries and Whipped Cream, can it get better than that??
This is very easy to make and its fun if you try it with kids.. My son had wonderful time assisting me ... licking away all the extra cream :-)
What you Need :
Strawberries : 10 - 15, fresh and ripe
Mascarpone : 50 gms
Whipping Cream : 75 ml
Granulated White Sugar : 3 Tbsp
Vanilla extract : 1 tsp (optional)
Chocolate Sauce : to drizzle (optional)
- Wash the Strawberries and pat them dry with a kitchen towel.
- Make sure that the strawberries sit flat, if not cut the green stems off the strawberries so they will stand upright when served.
- With a small sharp knife, cut an "X" in each strawberry, cutting almost to the bottom of each strawberry. Make sure not to cut it till the end, if you do the strawberry comes apart.
- Gently with your fingertips, spread each strawberry apart to make "petals".
- Now make the cream filling.
- In a bowl whip the mascarpone cheese and whipping cream until soft peaks form. Add the sugar and vanilla and continue to whip until stiff peaks form.
- Spoon the cream into a piping bag fitted with a large tip.
- Pipe the cream into the strawberries.
- Place in the Refrigerator for 30 mins and serve cold.
- Drizzle with Chocolate Sauce if you like.
Monday, 31 October 2011
Happy Halloween

Wish you all a Very Happy Halloween!!
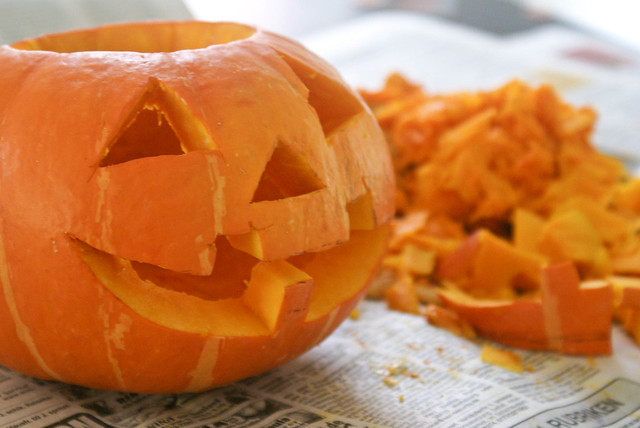
My son and I together carved this pumpkin. He was very excited about it :-)
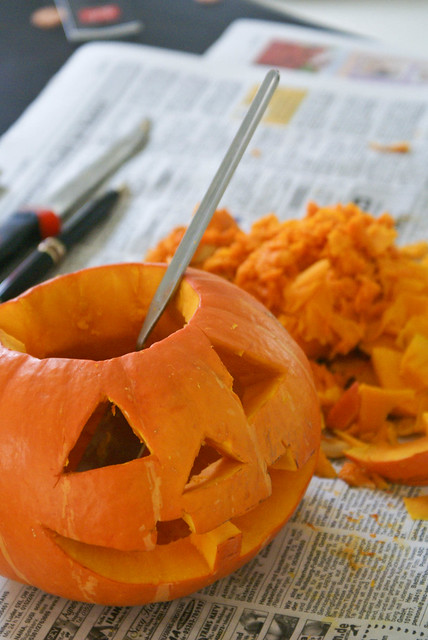
This was the first time we carved the pumpkin... and it came out quite well!!

Have Fun!!!
Tuesday, 25 October 2011
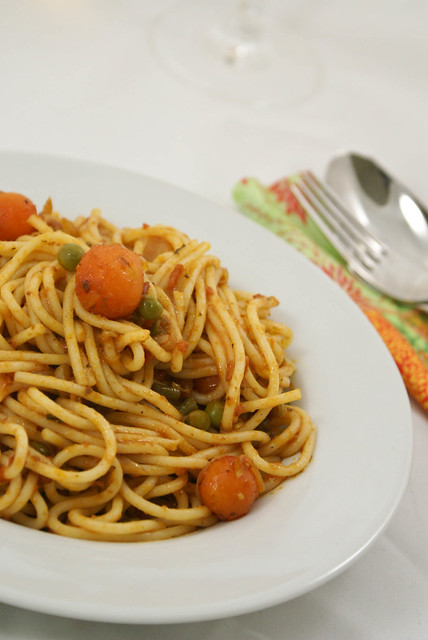
Jeera Spaghetti in Tomato Sauce
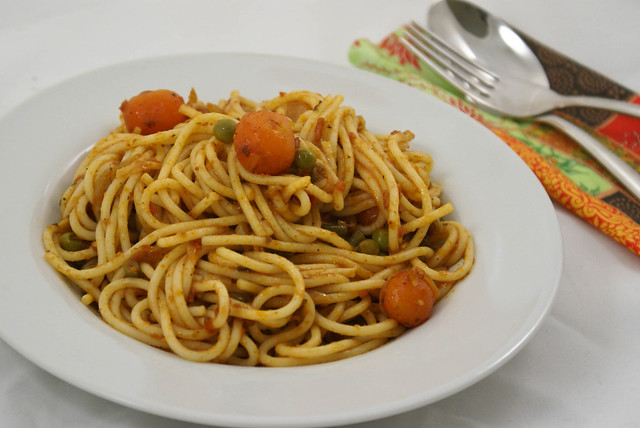
I am not a big fan of Italian food.
But my lil one is totally opposite :-) All the nakhras and excuses he gives every day during lunch and dinner just vanish if you place a piece of Pizza or a bowl of pasta before him.
Last week he was down with cold and fever and completely lost his appetite.. So the only way to make him eat was to cook his favorite, Spaghetti!!
What you need :
Spaghetti : 2 fistfuls, makes 4 servings
Onion : 1 small, finely sliced
Garlic : 3 cloves, crushed
Carrots : 1 , chopped
Beans : a fistful, chopped
Peas : 1 cup
Dried Oregano : 1 tsp
Dried Basil : 1 tsp
Kitchen King : 1 Tbsp
Jeera/ Cumin : 1 Tbsp
Salt : to taste
Olive oil : 2 - 3 Tbsp
For Tomato Sauce :
Tomatoes : 3 big, chopped
Onion : 1 small, chopped
Garlic : 2 - 3 cloves, crushed
Basil leaves : a handful
Sugar : 1 tsp
Chilli Flakes : 1 tsp
Salt and Pepper : to taste
Olive oil : 2 - 3 Tbsp
- Prepare Sauce : Heat oil in a pan, and add onions and garlic, fry for few mins.
- Add Tomatoes, Chilli and Sugar.
- Cover and Cook in low heat for about 15 to 20 min, till tomatoes are done.
- Add Basil leaves and season with salt and pepper.
- Let it cool, and transfer to a blender, and blend to a coarse paste.
- For Pasta : Prepare Spaghetti according to instructions and set aside.
- In a wide pan, heat oil.
- Add Jeera, garlic and onions, fry for few mins.
- Add dried oregano and basil.
- Now add the veggies(Carrots, peas, beans), season with salt and cook on low till the veggies are done.
- Add kitchen King and prepared tomato sauce.
- Mix well.
- At last add Spaghetti and toss.
- Serve hot.
Mom's Tips:
If the tomato sauce yields more than 1 and half or 2 cups, store the remaining in a bottle and keep it in refrigerator. You can store this for about 10 days.
You can add garam masala if you don't have kitchen king.
Thursday, 20 October 2011
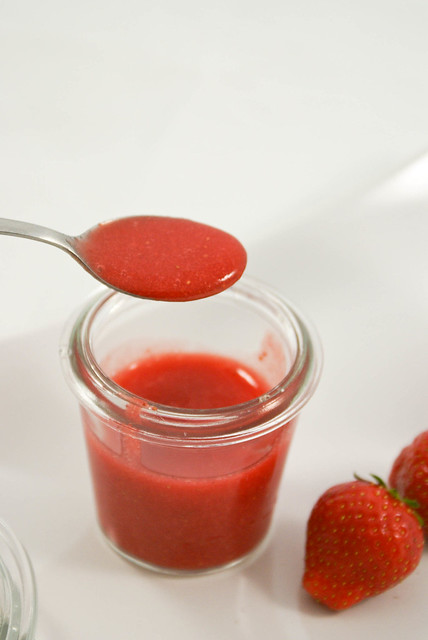
Strawberry Sauce/Puree
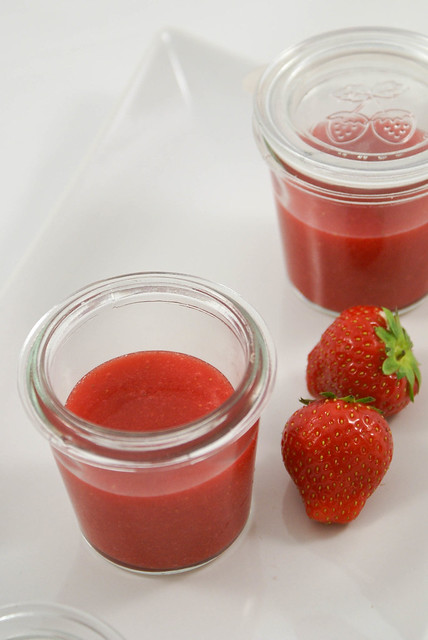
Autumn is starting and surprisingly I found some Strawberries in the Farmers market few days back... I wanted to preserve them so that we could have these delicious fruit even during the coming winter months.
I made a sauce out of half of the fruit. It is very simple recipe, and this sauce can be frozen and used when needed.
You can increase or decrease the quantity of sugar and lemon juice according to your taste.
What you Need :
Strawberries : 500 gms
Sugar : 100 gms
Lemon Juice : 2 - 3 Tbsp
- Wash the Strawberries, and remove the green stems, and cut into quarters.
- Put in the blender or food processor, add Sugar and blend till smooth.
- Remove and add lemon juice and mix well.
- Store in a jar and freeze.
- You can add this as topping on Vanilla ice cream or add it to milkshake.. and Enjoy!!
Monday, 17 October 2011
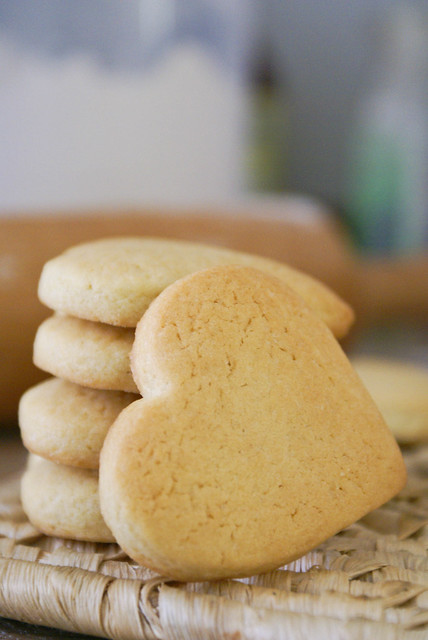
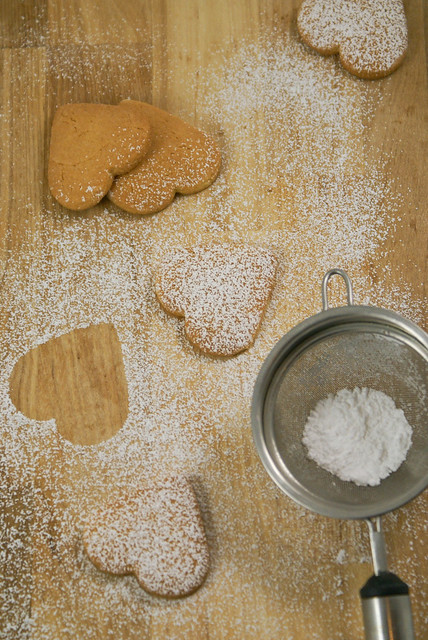
Sugar Cookies

Its been just about more than a month, my mom came... days flew so fast, that its almost time to say good-bye to her. After she came I became one lazy bum.. I guess it will take some time for me to get adjusted to my normal routine.
Shopping and packing is all done, but I wanted to send something homemade for my dad and cousins back in India.... After a lot of thinking, I came up with Sugar cookies.
I never made Sugar cookies before and that too with frosting. I always feel that frosting cookies is an art... just like painting with all those colored icings and piping bags....
The cookies came out really well... and icing was not very bad either, but I guess I have to practice more :-)
The recipe source is from here.
What you need:
For Cookies:
All purpose Flour : 400 gms
Butter : 225 gms, unsalted, at room temperature
Granulated white Sugar : 200 gms
Eggs : 2, at room temperature
Baking Soda : 1 tsp
Salt : 1/2 tsp
Vanilla extract : 2 tsp
For Icing:
Egg whites : 2, at room temperature
Lemon Juice : 2 tsp
Icing Sugar : 3 cups
- In a clean dry bowl sift together the flour, salt, and baking soda.
- In an other bowl, beat butter and sugar until light and fluffy.
- Add the eggs, one at a time and beat until combined.
- Now add vanilla extract and beat for 1 min.
- Add the flour mixture, in batches and beat until you have a smooth dough.
- The dough may be sticky and may come up the beater attachments, so beat at slow speed, scraping dough from the sides and from the attachments in between.
- Wrap the dough in a plastic wrap and refrigerate for about two to three hour, until firm enough to roll.
- Preheat oven to 200 degrees C.
- Line two baking sheets with parchment paper.
- Remove the chilled dough from the refrigerator and, take half of the dough and put the reaming half back in the refrigerator(because it is easy to work with small quantity of the dough)
- On a lightly floured surface, roll out the dough to a thickness of 1 cm.
- Making sure that the dough does not stick to the counter, keep turning the dough as you roll.
- Cut out desired shapes using a lightly floured cookie cutter and transfer to baking sheet. Place the baking sheets with the unbaked cookies in the refrigerator for about 15 minutes to chill the dough and prevent from losing their shape while baking.
- Bake cookies for about 8-10 minutes (depending on size). Mine took exactly 8 mins.(just until the edges start to brown)
- Remove from oven and cool them on a wire rack.
- Enjoy them as it is or frost with icing.
- Sift Icing sugar to remove any lumps.
- In the bowl beat the egg whites with the lemon juice, with the hand mixer.
- Add the sifted sugar and beat on low speed until smooth.
- Add more sugar or water to get the right consistency.
- Add food coloring, if desired.
- The icing needs to be used immediately or put in an airtight container as it hardens when exposed to air.
- I made icing with 2 types of consistencies.
- One little thick with which I piped the edges, and then with the icing of flowing consistency(lil thin) I filled the inside using a spoon.

Mom's Tips:
Using disposable piping bags is helpful when using more colors.
When frosting, let the edges dry, before filling with thin consistency icing.
I found this wonderful site which shows how to frost cookies, If interested have a look.
Wednesday, 12 October 2011
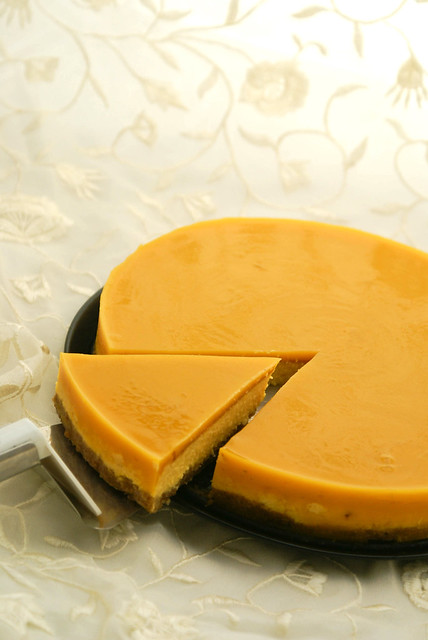
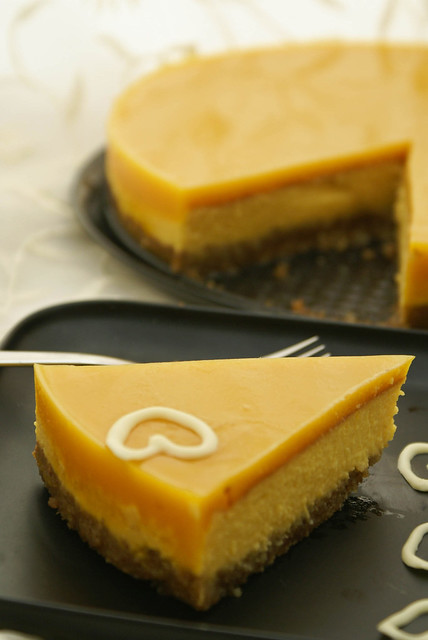
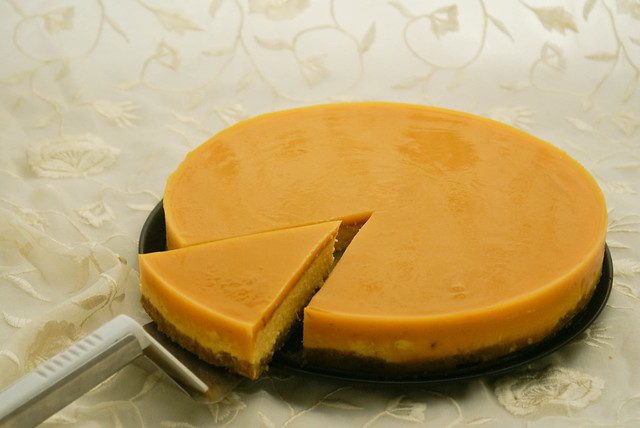
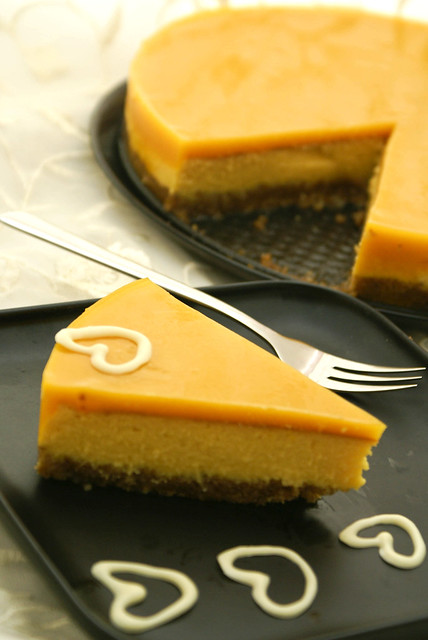
Mango Cheesecake
Its been raining here from past one week and the temperature has dropped to around 15 degrees and some days even less, and the worst part is the wind. The cold freezing winds blowing all day long.
We removed the winter clothes, sweaters, pullovers and jackets from the bottom racks... the autumn is here and winter is not very far.
The starting of autumn and winter is very depressing, I miss the sun, the warmth.
So to make us feel better, I baked this cheesecake last weekend. You all must know how much we love mangoes, in this post. So I have mixed my two loves, mangoes and cheesecakes and the result was divine taste.
What you need:
For the Crust:
Graham Cracker Crumbs or any mild sweet cookies : 100 gms
Almonds ground to powder : 75 gms
Sugar : 2 Tbsp
Butter : 3 Tbsp
Cheesecake Batter:
Mascarpone : 250 gms
Sugar : 100 gms
Eggs : 3, at room temperature
Vanilla Extract : 1 tsp
White Chocolate : 100 gms (optional)
Mango Pulp : 250 gms
Mango Gelee:
Mango pulp : 2 cups
Gelatin : 3 sheets
Sugar : 2 Tbsp
- To prepare the crust: Blend all ingredients together in a food processor and press it onto the bottom of 9" round spring-form pan and bake for about 12 minutes or until slightly brown. Keep aside to cool.
- Cheesecake will shrink as it cools. Generously greasing the sides of the baking pan before pouring in batter will allow the cake to pull away from the pan as it cools and shrinks instead of pulling apart from the middle.
- To prepare the cheesecake batter: Whip mascarpone, vanilla extract and sugar until smooth. Make sure that there are no lumps, before you add the eggs.
- Add the egg, one at a time. Whip well for 1 or 2 mins on medium speed.(Over-beating incorporates additional air and tends to cause cracking on the surface of the cheesecake). Keep the beater aside.
- Melt the white chocolate(if using) and with a rubber spatula, mix it into the batter.
- Now, add the mango pulp and mix well.
- Pour onto the prepared crust.
- Bake in waterbath(wrap the bottom of your springform pan in aluminum foil and place it in a larger pan with water in it, just halfway up the outside of the springform pan) at 210 degrees C for about 40 minutes(+ or - 10 mins : every oven is different so check in between), or until the edges are set but the center is slightly jiggly when shaken gently.
- After about 40 minutes, turn your oven off and leave the cheesecake inside the turned off oven for another 30 mins. Cool at room temperature with a plate or cookie sheet inverted over the spring form. (loosen the cake from the edge of the pan by running the tip of a knife between the cake and the side of the pan.)
- For the Mango gelee: Dissolve sugar in the mango pulp. Soften gelatin in half cup water. Squeeze and add it to 1/2 cup of warm water. Stir until gelatin is dissolved. Add it to mango pulp.
- After the cake has cooled, pour the prepared mango gelee on the top.
- Refrigerate overnight and serve chilled.
Mom's Tips:
A spring-form pan (with removable side and bottom) is the most preferrable pan for making cheesecakes.
Avoid over-baking. The cheesecake will continue to bake after it is removed from the oven. The center of the cheesecake should be just slightly moist when it is ready to be removed.
Bake the cheesecake in a water bath to keep the oven moisture high and the heat gentle.
Sunday, 9 October 2011
Cinnamon Rolls
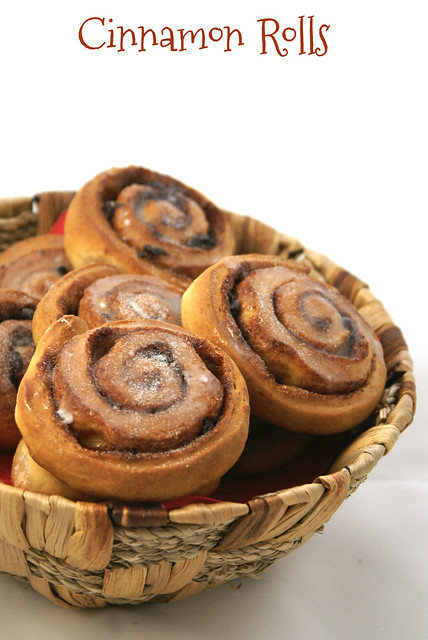
I have always loved the flavor of Cinnamon. So it is obvious that Cinnamon Rolls are my weakness :-) Its like a burst of flavor in every bite.
I always shied away from making these beauties, as I always thought its very difficult to make and I was afraid to experiment with yeast.
But this time I had that strong craving... and I wanted to make these..
Trust me... it is not as difficult as I have assumed. Yes, it is time consuming.. but not difficult.
I cannot say that these look very perfect, but for a first attempt it is decent :-)
What you need :
For the dough:
All Purpose flour : 2 1/2 cups
Instant yeast : 1 Tbsp
White granulated Sugar : 3 Tbsp
Salt : 1/2 tsp
Vanilla Extract : 1 tsp
Milk : 3/4 cup
Butter : 30 gms
Egg : 1, large
For the filling:
Light Brown Sugar : 1/2 cup
Ground Cinnamon : 2 Tbsp
Raisins : 1/2 cup (Soak in warm water for about 15 mins, drain and gently squeeze to remove excess water with a paper towel) - optional
Honey : 2 Tbsp - optional
Butter : 1/2 cup, unsalted, just about melted
For the icing:
Icing Sugar : 2 cups
Milk : 2 to 3 Tbsp
Vanilla extract : 1/2 tsp
- In a large bowl, combine 1 and 1/2 cups of the flour, the instant yeast, sugar, and salt.
- In a small saucepan over low heat, warm up the milk, butter (just warm, not hot). It's fine if the butter doesn't fully melt. Pour this into the flour mixture.
- Add in the egg and the vanilla extract.
- Using an electric mixer, beat at low speed just until moistened, then beat for 3 minutes at medium speed.
- Put the beater aside, and by hand, using a wooden or rubber spatula, stir more flour in gradually until you've made a soft dough.
- Turn the dough out onto a floured work surface and knead it by hand until it feels smooth and elastic (around 5 mins)
- Place the dough in a lightly greased bowl and cover.
- Let the dough rise in a warm spot until doubled. (about 1 to 1.5 hrs)
- While the dough is raising, prepare the filling : In a medium size bowl, mix together sugars and the salt. Mix in the raisins. Add Honey and stir to combine. Set aside.
- Butter the bottom and sides of a pan.
- When the dough has risen sufficiently, turn it out onto a lightly floured work surface, and use a rolling pin to roll it into a rectangle.
- Use a pastry brush to spread the melted butter all over the dough.
- Sprinkle all of the filling evenly over the dough, leaving about one inch uncovered at the farthest short side of the dough.
- Starting with the short side, carefully roll up the dough. It needs to be snug but not too tight.
- Seal the edges.
- Using a sharp, smooth knife cut the dough into of even thickness.
- Place them, cut side down, evenly spaced in the pan.
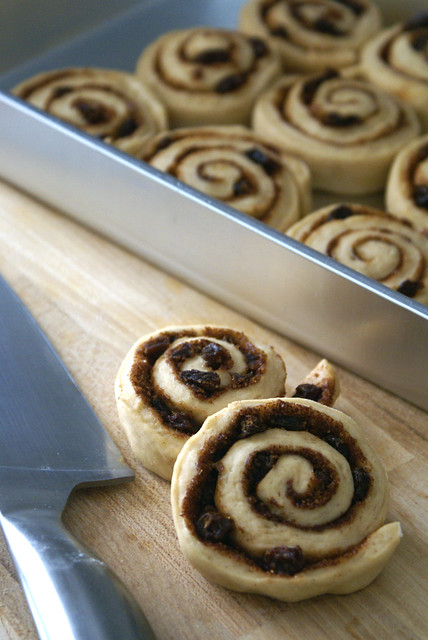
18. Cover the pan with lightly greased plastic wrap. Place it in a warm spot to rise. (about 30 mins)
19. When the rolls are raising: Pre-heat the oven to 200 degrees Centigrade.
20. When the rolls have doubled in size, they are ready to go into the preheated oven. Bake them for approximately 25 minutes, until they're golden brown.
21. When the rolls are in oven, make the icing : In a small bowl, stir together the icing sugar, milk, vanilla extract. Stir until all the lumps dissolve. If you'd like the icing thinner or thicker, adjust it with a bit more sugar or milk. To drizzle it on, make it on the thinner side. To smooth it on like frosting on a cake, make it a bit thicker.
22. As soon as the rolls come out of the oven, brush some melted butter over them.
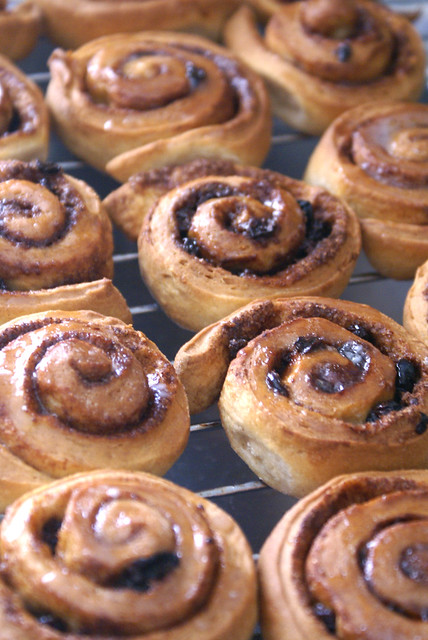
23. Drizzle rolls with the already made Sugar Glaze.
24. They are best when served warm. As a matter of fact they don't last by the time they cool :-)
And the Verdict:
These sticky lil treats are worth all the effort. Both my men savored them as dessert and even as breakfast the next day!!

Friday, 30 September 2011
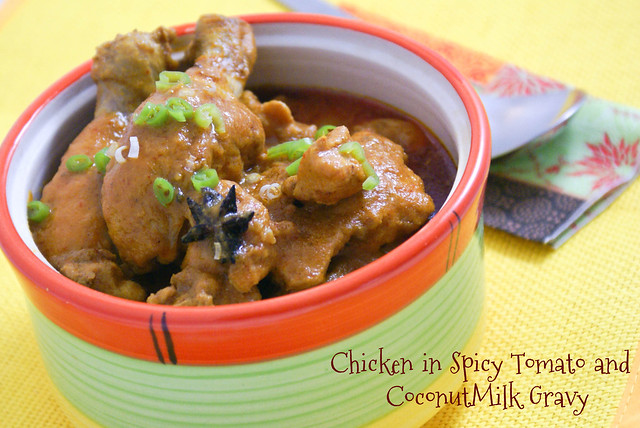
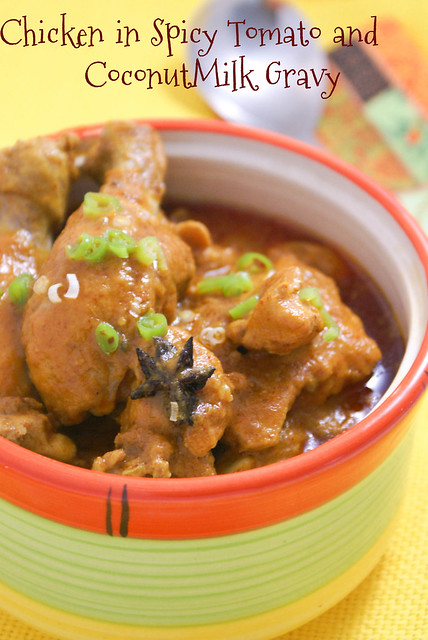
Chicken in Spicy Creamy Tomato Gravy
I saw this recipe here. And I loved it. I wanted to try it immediately. But it needed so much oil.. well, I thought, once in a while it is okay to cook such yummy dish.
But again, my weighing machine told me I was crossing the acceptable weight. My jeans was telling me i was losing shape....
So, I saved it in my favorites for some days.. but it kept haunting me... why not try once, one time does not matter...
And who says I am out of shape.... Round is also a shape :-)
What you need:
Chicken : 1 Kg, with bones
Onion : 1, big, chopped
Ginger Garlic paste : 3 Tbsp
Lemongrass : 4, chopped
Dry red chillies : 10, soaked in water for about 15 - 20 mins (adjust according to taste)
Tomato Soup : 1 cup
Coconut milk : 1 cup
Star Anise : 2
Cinnamon : 2 inch
Cloves : 5
Cardamom Pods : 5-6 , ground coarsely
Salt : to taste
Turmeric : 1/2 tsp
Oil : for deep frying + 1/4 cup
- Marinate chicken with Salt and Turmeric. Set aside for an hour.
- Heat oil for frying in a deep wok and fry the chicken pieces till golden, drain on paper and keep aside.
- Put Onion, Lemongrass, Red chillies and Ginger Garlic paste in a food processor and make a coarse paste.
- Heat 1/4 cup oil in a wide pan.
- Add cinnamon, cloves, cardamom and star anise, until it emit a nice aroma.
- Add the processed onion paste. Fry till the raw smell disappears and is fragrant and oil separates.
- Add tomato soup, coconut milk and chicken pieces.
- Add salt.
- Lower the heat and cook till the sauce thickens.
- Garnish with spring onion, and serve hot with rice or rotis.
Mom's Tips:
If you don't have tomato soup, you can use tomato puree. Use the homemade puree, I feel store bought very tangy.
If you don't want so much fat in your dish, you can skip frying the chicken pieces before hand, and add them directly in Step 7 and cook till done.
Friday, 23 September 2011
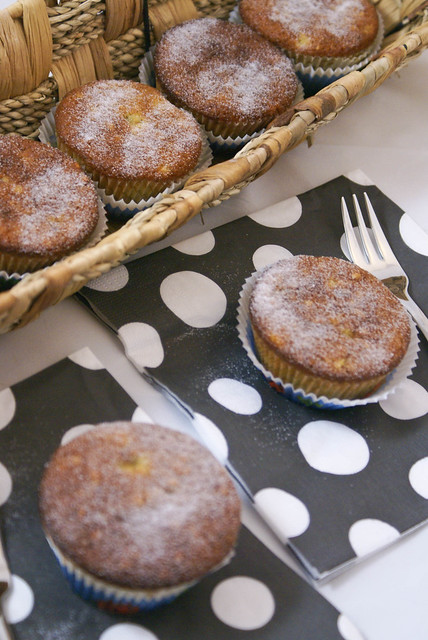
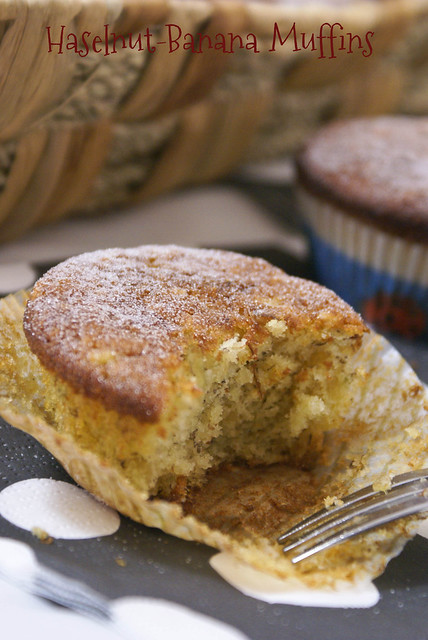
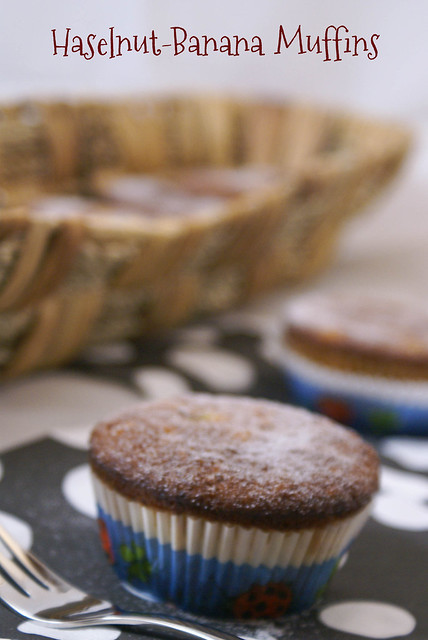
Hazelnut Banana Muffins
Food Photography - It has become an obsession to me these days...
I agree that i am not very good at it.. and I am still in the learning phase... and like the saying goes "Practice makes you Perfect", I am clicking everything that is edible :-)
I have started submitting pictures to foodgwaker and tastespotting... but every time they get rejected.
Well, I am not disappointed... it gives me a scope to improve and think what I have done wrong.
At last two days back one of my picture was accepted in foodgwaker.... I guess they are easy to please than the tastespotting guys :-)
Anyways, I made my first baby step :-)
I made these muffins along with the Orange muffins on my son's Birthday.. I guess you will enjoy them as much as my son did!!
What you need :
Bananas : 2, ripe
All Purpose Flour : 150 gm
Sugar : 150 gm
Butter : 150 gm, soft at room temperature
Eggs : 3
Lemon juice : 1 Tbsp
Hazelnut :50 gm, finely chopped
Baking Powder : 1 Tbsp
Baking Soda : 1/2 Tbsp
Salt : a pinch
- Pre-heat the oven to 180 degrees Centigrade.
- Butter and Flour Muffin pan or line it with muffin cups.
- Sieve together Flour, Baking powder, Baking soda and salt.
- Peel the Bananas, and mash them with the back of a fork and mix in Lemon juice.
- Beat Butter, Sugar and Eggs till pale and creamy.
- Add Banana and Hazelnut pieces.
- Add the flour mixture to the Butter and Egg mixture in batches, and fold gently till everything is mixed well, with a rubber spatula. Do not over mix the batter.
- Fill each muffin cup till 3/4th full with batter, using a spoon.
- Place in the oven and bake until a toothpick inserted in the center of a muffin comes out clean, about 20 minutes.
- Transfer to a wire rack and let cool for about 5 - 10 minutes before removing from pan.
Food Event :
Srivalli's Kids Delight Party. and
Rak's Sweets/Desserts with Fruits/Veggies started by Niveditha
Monday, 19 September 2011
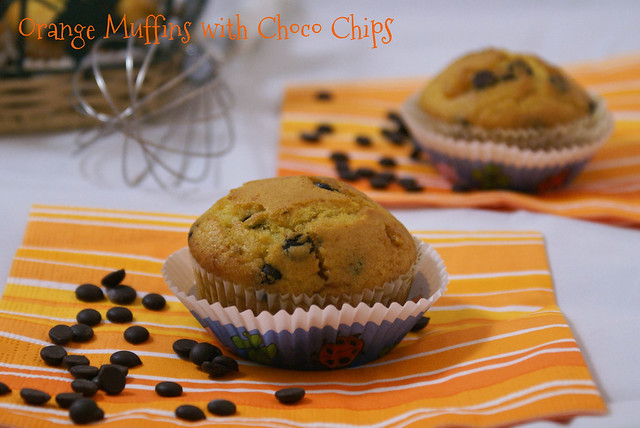
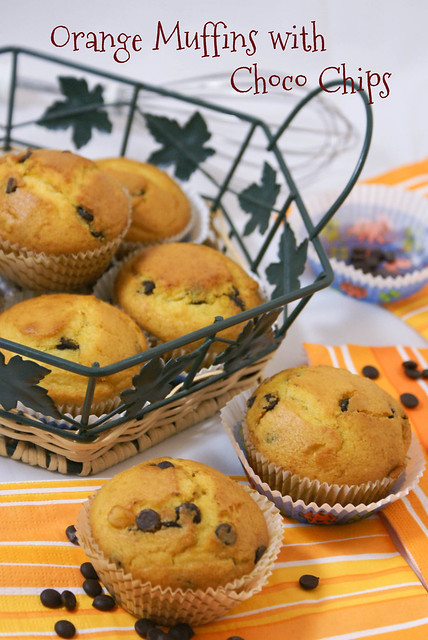
Orange Muffins with Chocolate Chips
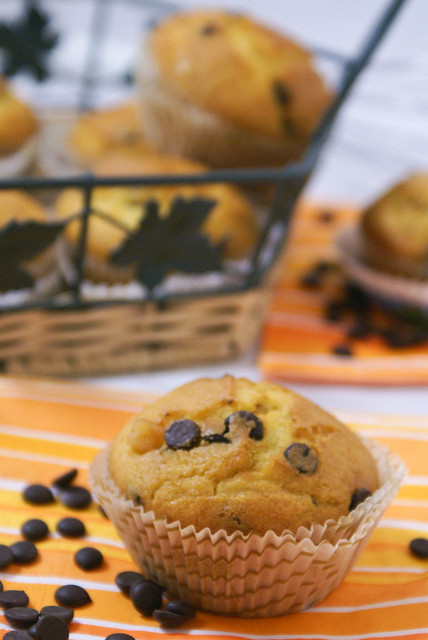
Time just flies when you have kids around. My son celebrated his third birthday few days back... I don't remember if I was so demanding and if my birthday was celebrated this way, with mom and dad planning from almost one month ahead about what to do, how to do, gifts and clothes for the big day.
Since we moved recently to a new town, we do have many friends in the neighborhood so his birthday was celebrated in the Kindergarten. I baked a chocolate cake, and some orange muffins and hazelnut muffins for the kids. I was on very happy and on cloud nine.. when the kids enjoyed them saying yumm... very tasty... will u make them again :-)
Coming to the recipe, this is from the local German cookbook I bought in the Flohmarket(Flea-market) few months back. I feel that if you look patiently then you can find many useful things in the Flohmarket. How many of you like to visit the Flohmarkets?
What you Need :
(Yields approx 12 muffins)
All purpose Flour : 280 gm
Sugar : 100 gm
Orange Peel : 80 gm, finely chopped
Baking Powder : 2 1/2 Tbsp
Baking Soda : 1/2 Tbsp
Salt : a pinch
Egg : 1, whole
Oil : 80 ml
Orange Juice : 100 ml
Buttermilk : 200 ml
Chocolate chips : 70 gm
- Pre-heat the oven to 180 degrees Centigrade.
- Butter and Flour Muffin pan or line it with muffin cups.
- Sieve together Flour, Baking powder, Baking soda and salt.
- Add in Orange Peel and mix well.
- In a separate bowl beat egg till light and fluffy.
- Whisk in Sugar, Oil, Orange juice and Buttermilk .
- Add the flour mixture to the Buttermilk mixture in batches, and fold gently till everything is mixed well, with a rubber spatula. Do not over mix the batter.
- Fold in Chocolate chips .
- Fill each muffin cup till 3/4th full with batter, using a spoon.
- Place in the oven and bake until a toothpick inserted in the center of a muffin comes out clean, about 20 - 25 minutes.
- Transfer to a wire rack and let cool for about 5 - 10 minutes before removing from pan.
Food Events :
Sending these to
Srivalli's Kids Delight Party. and
Rak's Sweets/Desserts with Fruits/Veggies started by Niveditha


Wednesday, 7 September 2011
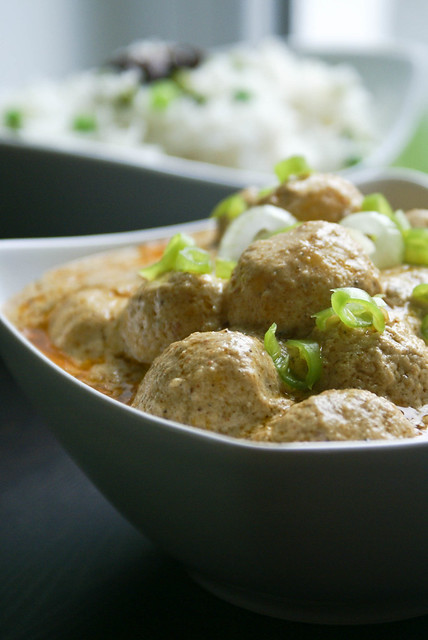
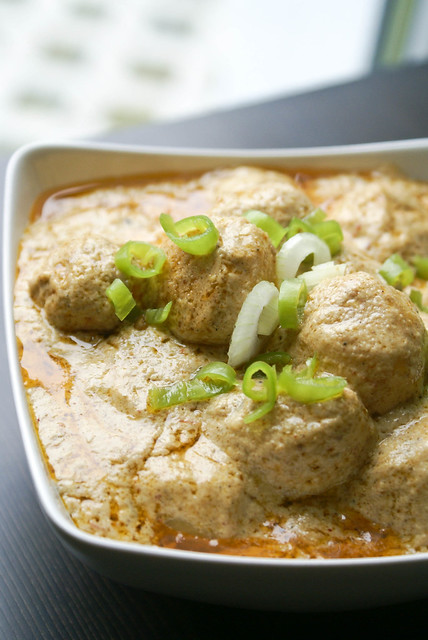
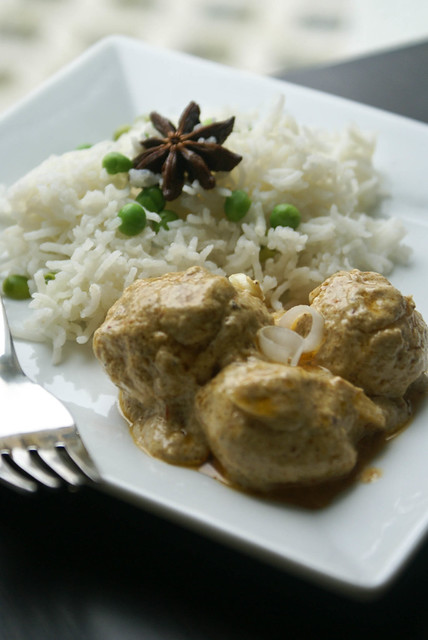
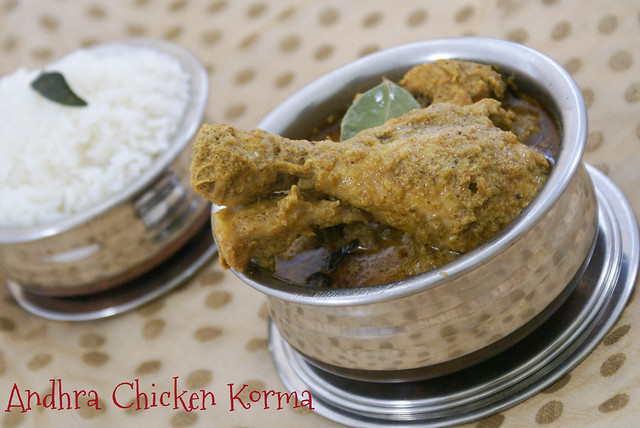
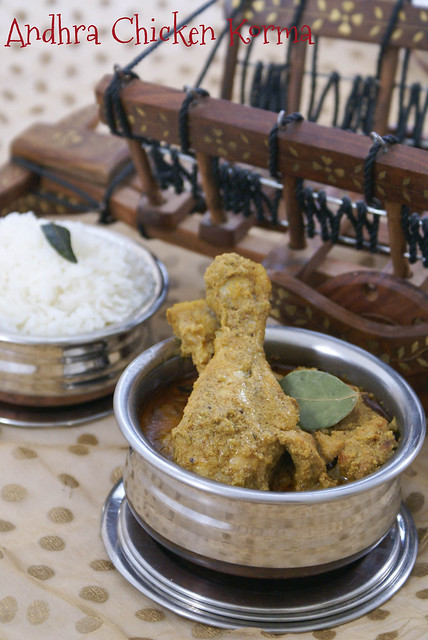
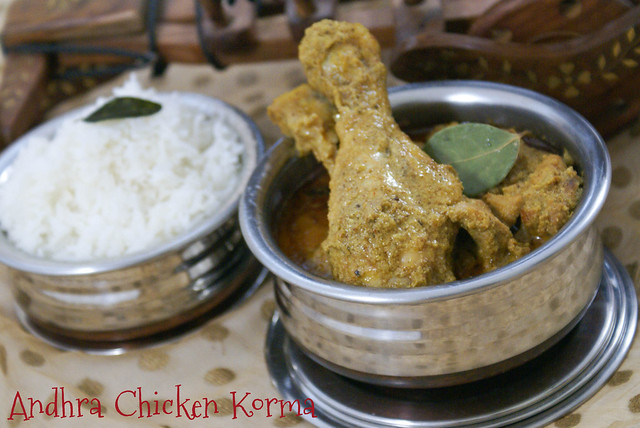
Andhra Chicken Korma
The other day I was wondering... 'Am I blogging what I cook?' or 'Am I cooking for blogging?'
I guess this question arises, in almost every food blogger.
My hubs started complaining. I don't deny that he is the one behind my blog with constant encouragement, my best critic and adviser. But at times when lunch or dinner is ready, and I jump upstairs with my dishes and props, saying "Just a min hon, I will be just right back, I need to take a picture", he gets upset. He says you are cooking just because of blogging. Hmm... well... what can I say?
My last post was 6 days back, and every day I was thinking about something special to cook so that I can post again. Does every one have the question "What to post next?" hovering in your mind all time? or is it just me?
Coming to the recipe, when I went grocery shopping the other day to buy chicken, I had some other recipe in mind. But I could'nt get all the ingredients. So I made this simple Chicken Korma my grandma used to make when we were kids.
What you need:
Chicken : 1 Kg, cut into bite sized pieces
Onion : 1 big, finely chopped
Jeera: 1 tsp
Curry leaves : a few
Ginger garlic paste : 2 Tbsp
Green chillies : 3 or 4, slit lengthwise
Lime juice : 1 Tbsp
Red Chilli powder : 2 tsp
Turmeric : 1/2 tsp
Salt : to taste
Water / Chicken Stock : 1 cup
Masala powder:
Cloves: 8 to 10
Cinnamon: 2 inch piece
Coriander seeds: 3 Tbsp
Cardamom seeds: 1 tsp
Roast and grind to fine powder
Ground Paste:
Poppy seeds: 3 Tbsp, soaked in warm water for 1 hour
Coconut: 1/2 cup, grated
- Heat oil in a wide thick bottomed pan.
- Add Jeera and curry leaves.
- Add onions and fry till the sides turn brown.
- Add green chillies and ginger garlic paste. Fry for 3 to 4 mins.
- Add turmeric and red chilli powder. Fry for 2 more mins.
- Add poppy seeds and coconut paste. Fry till it emits nice aroma.
- Add the prepared masala powder. Mix well.
- Stir in salt.
- Add the chicken pieces. Cook on high without lid, till chicken pieces turn white.
- Add 1 cup of water or chicken stock. Cover and reduce heat to low.
- Cook for around 15 to 20 mins, or till done.
- Add lemon juice and adjust salt.
- Serve hot with Steamed Rice or Dosa or Garelu/Vada.
Thursday, 1 September 2011
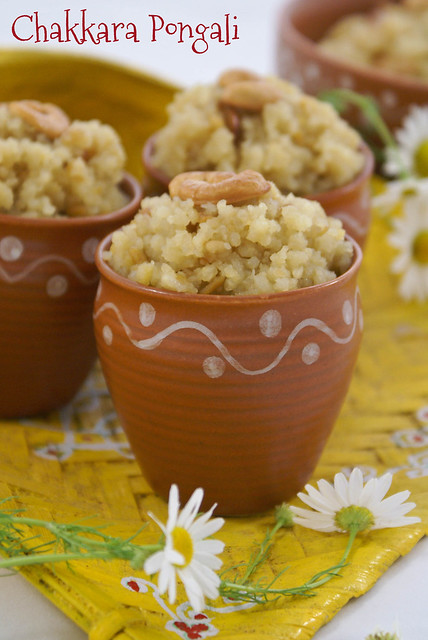
Happy Vinayaka Chavithi : Chakkara Pongali
Wish you all Happy Vinayaka Chavithi !!
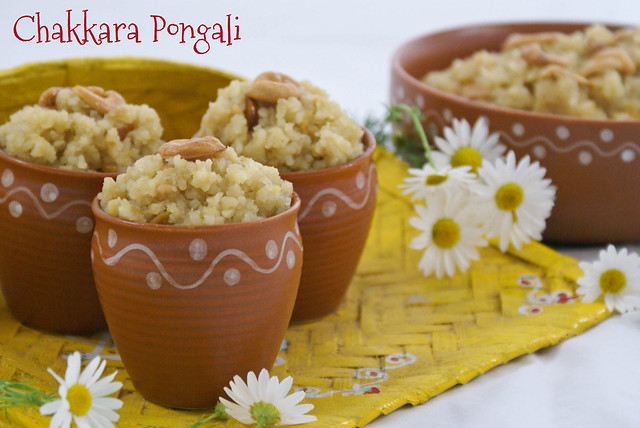
Back home in India, they used to put a big Ganesh Idol in the temple premises in our colony. I used to go there along with my friends after school to have prasadam :-) Most of the days, they used to give chakkar pongal as prasadam. It used to taste divine with light karpuram(camphor) flavor.
I have always make Pal pongal for all the festive occasions. Today I tried Chakkar Pongal, as mom is here to guide me :-)
What you need :
Rice : 1 cup
Moong Dal / Pesara pappu : 1/2 cup
Jaggery / Bellam : 1 cup (grated)
Sugar : 1 cup
Ghee / Clarified Butter : 1 cup + 2 Tbsp
Water : 3 cups (See Notes)
Pacha Karpooram (Edible Camphor) : less than a pinch (See Notes)
Cashews : to garnish (roasted in a tsp of ghee)
Mom's Tips :
Back home in India, they used to put a big Ganesh Idol in the temple premises in our colony. I used to go there along with my friends after school to have prasadam :-) Most of the days, they used to give chakkar pongal as prasadam. It used to taste divine with light karpuram(camphor) flavor.
I have always make Pal pongal for all the festive occasions. Today I tried Chakkar Pongal, as mom is here to guide me :-)
What you need :
Rice : 1 cup
Moong Dal / Pesara pappu : 1/2 cup
Jaggery / Bellam : 1 cup (grated)
Sugar : 1 cup
Ghee / Clarified Butter : 1 cup + 2 Tbsp
Water : 3 cups (See Notes)
Pacha Karpooram (Edible Camphor) : less than a pinch (See Notes)
Cashews : to garnish (roasted in a tsp of ghee)
- Heat 2 Tbsp of Ghee in a large deep pot or a pressure cooker.
- Add Moong dal, and fry for a min, till emits nice aroma and turns to light brown color.
- Add Rice, and water.
- Cook till done, stirring in between to avoid burning.
- Simultaneously, in a medium sized pan, melt sugar, jaggery in half cup water. Strain to remove any impurities.
- Turn the heat of the Rice and dal mixture to low, and add the syrup. Mix well.
- Add ghee and cashews.
- Now add karpooram and mix well.
- Serve hot or cold.
Mom's Tips :
- Instead of 3 cups of water, you can use 2 cups water and 1 cup milk.
- Quantity of Sugar and be increased or decreased according to taste.
- Do not hesitate while adding ghee :-) The more you add, the tastier it will be :-)
- If you do not have edible camphor, add powdered cardamom.
- You can even add Raisins or pieces of dry coconut (roasted in ghee) to garnish.
Tuesday, 30 August 2011
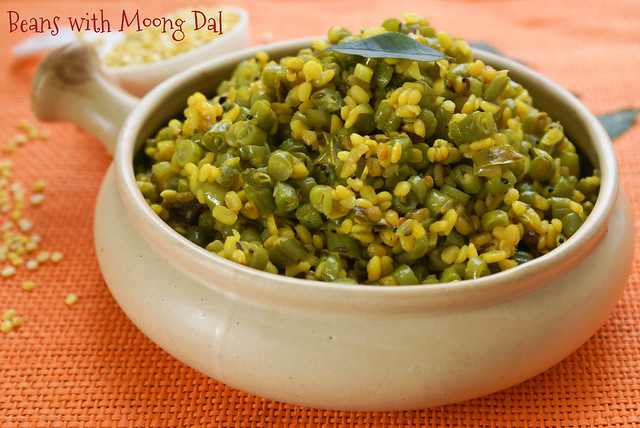
Beans with moong Dal
Last month was holiday time here in Germany. Most of my friends had their moms visiting them. When ever I used to call them, they usual reply I got was " I am playing with my son, and lunch?? yeah.. my mom took over from me, she is cooking something." An other friend of my said " I had some shopping to do, so I left my daughter with my mom, and they were playing together, she made delicious parathas by the time I came home." Again a similar story, one of my friend had guests for dinner, and when I called her the next day casually to ask how it went, she said " It went very well. All of them enjoyed the food so much... my mom made Biryani, and it was all sold up. "
So, got the pattern, when moms visit us, we handover the kitchen to them... But I thought I would be different. I wanted to ask my mom to rest while I cooked for her . My mom came here on Sunday... I was all excited... As I have decided earlier, I did not make my mom cook ... I asked her to relax and play with her grandson.
Today morning I woke up and came downstairs to get milk for my son and prepare for breakfast... and what do I see???
She is already up, milk already boiled, and cooled and ready to go into bottle. Everything prepared for breakfast... and she was planning on what to cook for lunch.... my my... u see.... Moms :-)
So its not that we handover the kitchen to them... they take over from us :-) or is it the same ... (confused)
Coming to the recipe... This was made by my mom for today's lunch.... a simple and delicious dish which goes very well with Steamed Rice or Rotis.
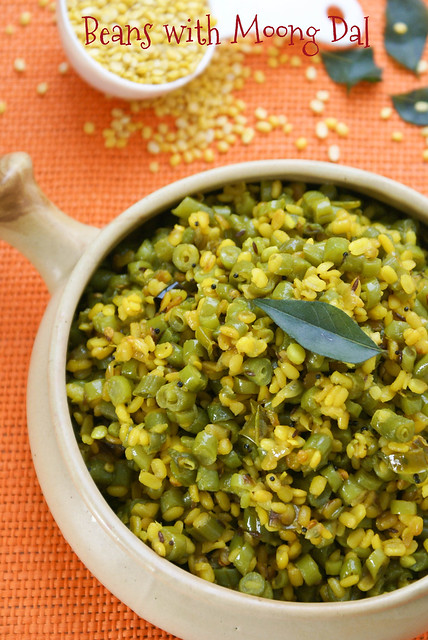
What You Need :
Beans : 400 gms
Moong Dal : 1 cup
Ginger : 1 inch piece, finely chopped
Green Chillies : 2, finely chopped (increase or decrease acc. to taste)
Onion : 1 , finely chopped
Turmeric : 1/4 tsp
For Tadka :
Dry Red Chillies : 2
Mustard seeds : 1 tsp
Jeera : 1 tsp
Oil : 3 Tbsp
- Soak Moong Dal in enough water for 2 hrs. Strain and keep aside.
- Boil a cup of water in a medium sized pan, add salt and add chopped beans. Cover and cook till done. Strain the beans, and reserve this water.
- Heat oil in a wide pan. Add all ingredients under tadka.
- After the mustard seeds splutter. Add onions, ginger, green chilli and turmeric.
- Fry for a minute.
- Add moong dal. Fry for a minute.
- Add 1/2 cup of the water from Step 2.
- Add salt, cover and cook on low heat for 5 minutes. Till the water disappears.
- Add Beans and fry for 2 - 3 minutes on medium heat, and then on high heat for 2 min.
- Serve hot with Rice or rotis.
Do not add strained water in Step 7, more than 1/2 cup, else it becomes mushy.
Add a handful of chopped coriander leaves for extra taste.
If you are in a hurry, or if you forgot to soak dal before hand. Boil dal along with beans. Strain immediately after done.
Thursday, 25 August 2011
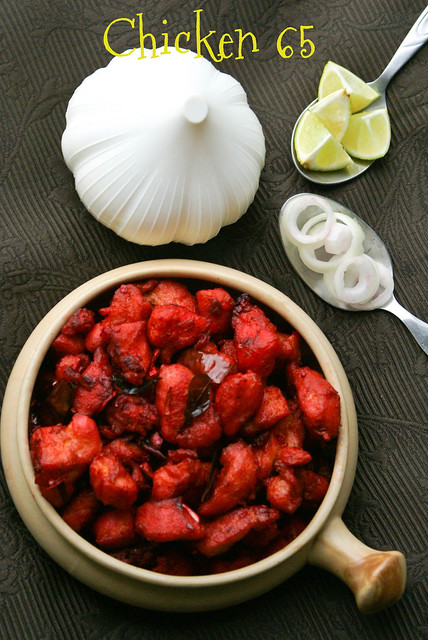
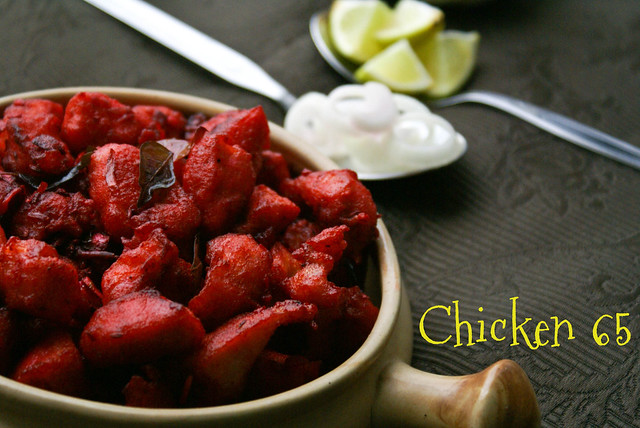
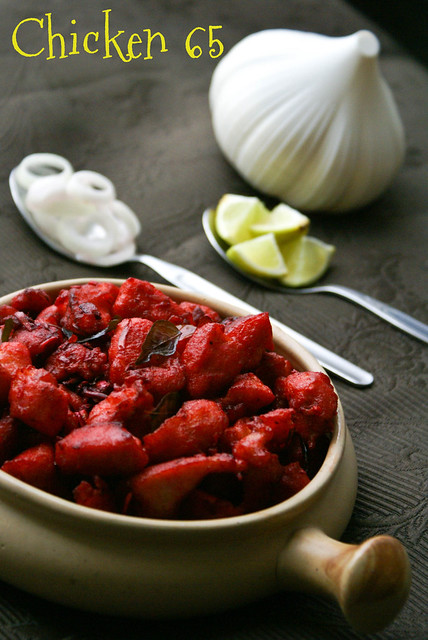
Chicken 65
There are many stories as of how the name Chicken 65 originated. Let's not discuss the details of the theories and stories revolving around this name, as the internet is full of them :-) Neither of them are so convincing.
Anyways.....
What's in a Name? That which we call Chicken 65, By any other name would taste as delicious :-)
There are many ways we make this dry, wet, spicy, less spicy. This version of my Chicken 65 is a medium spicy, dry dish, which can be served as starter.... along with drinks, or as a side dish for Sambar as my boys like it.
What you need:
Chicken : approximately half a kilo, skinless and boneless cut into bite sized pieces
Ginger Garlic paste : 2 Tbsp
Pepper powder : 1 tsp
Soy Sauce : 1 tsp
Ajinomoto : 1/2 tsp (See Notes)
Egg : 1, whole
Cornstarch/Cornflour : 1 or 2 Tbsp
Oil : for Frying
Chopped Ginger : 1 Tbsp
Chopped Garlic : 3 Tbsp (you can add less or more acc to your taste)
Curry leaves : a few
Green Chillies : 3, slit lengthwise (vary the number depending on your taste)
Tomato Ketchup : 3 Tbsp
Red Color : a few drops (optional)
Oil : 2 - 3 Tbsp
Chopped coriander and roasted cashews : to garnish
- Marinate chicken with Ginger Garlic paste, soy sauce, salt, pepper and ajinomoto for about 2 or 3 hours.
- Heat oil in a pan. Just before frying the chicken add egg and cornflour to chicken and mix well.
- Fry the chicken pieces in two or three batches, till they come to a nice brown color. Drain excess oil using a mesh strainer or a paper towel. Keep aside.
- Heat oil in a separate pan.
- Add chopped ginger, garlic, green chillies, curry leaves and fry for a min.
- Add tomato ketchup and red color (if using).
- Now add chicken pieces, and toss them till well coated.
- Garnish with chopped coriander and cashews and serve hot with onion rings and lemon wedges.
Mom's Tips:
Avoid using ajinomoto if you are cooking for small kids and pregnant women.
This is a very dry recipe, to make it with lil bit gravy, you can add yogurt and chilli garlic sauce as the base.
Monday, 22 August 2011
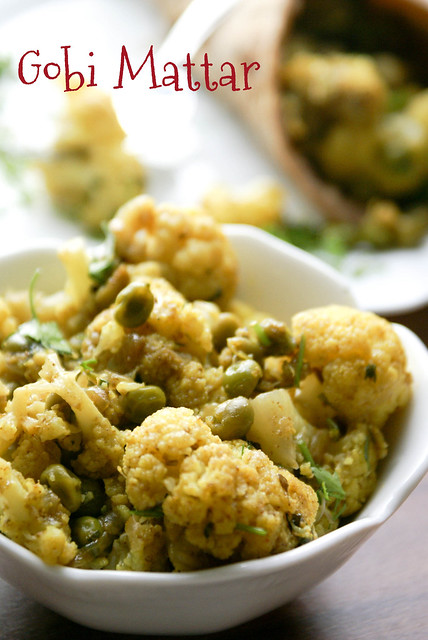
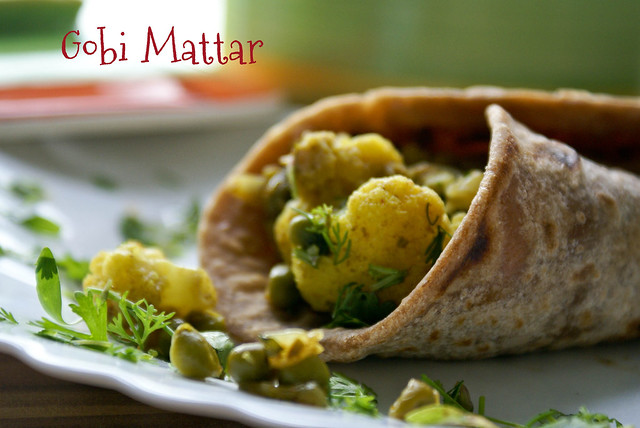
Gobi Mattar/ Cauliflower and Peas Stir Fry
Monday Blues.... it is the "ahhhhh no" day for me.
I just had the two most glorious days.. Saturday and Sunday... spending the whole day with my son and hubby... doing what ever I like... lazying on bed for as long as I need....
Now I should be back to work, get up early in the morning... prepare breakfast and pack boxes for both my men. Back to cleaning, cooking, washing :-)
So to overcome my Monday blues, I start my day listening to good music. I love listening to Rafi. My favorite songs are "Chaudavin Ka Chand Ho" and "Baharon Phool Barsaao" sung by him, such a wonderful songs with wonderful lyrics .... can a day start better than this!!
Thinking about delicious and comforting food also helps in dealing with Monday blues in my case :-)
Usually on Mondays I cook which is very easy, which takes very less time and effort.
The recipe I am sharing with you is one such dish which is simple yet delicious and goes well with Roti or Steamed rice.

What you need:
Cauliflower : 1, big and firm, cut into bite sized florets
Peas : 1 cup (I used frozen)
Salt : to taste
Chilli powder : 1 tsp (you can add more or less acc. to your taste)
Coriander leaves : a handful, chopped
Onion : 1, thinly sliced
Ginger : 1 inch piece, finely chopped
Curry leaves : a few
Turmeric : 1 tsp
Mustard seeds: 1tsp
Jeera : 1 tsp
Oil : 3 or 4 Tbsp
Dry roast and grind:
Coriander seeds (Dhaniya) : 1 1/2 Tbsp
Fennel Seeds (Saunf) : 1 1/2 Tbsp
Jeera : 1/2 Tbsp
- Add oil in a large pan. After it is hot, add mustard seeds and jeera.
- After the mustard seeds splutter, add curry leaves, chopped ginger and sliced onions and turmeric.
- Fry for a min or two, and add the ground masala powder.
- Fry for few mins, and add cauliflower and peas.
- Mix, and add salt and red chilli powder.
- Mix well. Cover and cook for 10 minutes on low heat.
- Remove the lid, increase the heat to high, and saute for few more minutes till the moisture disappears.
- Adjust salt. Add the coriander leaves.
- Serve with Roti or Steamed rice.
Mom's Tips:
You can also make this as a gravy, by adding a tomato paste or by adding cashew paste.
For extra crunchiness, you can add some peanuts.
Happy Cooking and Have a Fabulous Monday!!!
Let me know how you deal with Monday Blues.
Thursday, 18 August 2011
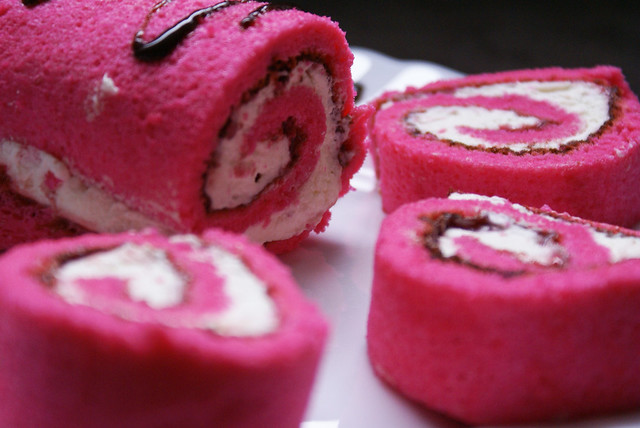
Double Choco Raspberry Roll

I love anything sweet... cookies, chocolates, cakes.... yummm. Cakes in particular are my favorite, nothing can beat the smell of a freshly baking cake in the oven. And talking about cakes, I always had a fascination towards Swiss rolls.
The two myths which got cleared recently are - 1. I used to think Swiss Rolls are from Switzerland :-) 2. I thought that only professional bakers can make Swiss Rolls
After I started Baking, I never tried to experiment with Swiss Roll, because I thought its a very complicated process.But despite the appearance, Swiss Rolls are in fact very easy to make.
It was easy than the Pineapple Pastry I made sometime back.
Its so light and fluffy , not very sweet. You can have this with tea, or as dessert after supper, I can have it even for breakfast :-)
And Swiss Rolls are not from Switzerland. According to wikipedia, they originated somewhere in Central Europe. Its a traditional German, Hungarian and Austrian type of Cake. And in Germany they call it Biskuitrolle or Roulade.
What you Need :
For the Cake :
Eggs : 4
Egg Yolk : 1
All Purpose Flour/Cake Flour : 4 Tbsp
Corn Flour : 3 Tbsp
Sugar : 1/2 Cup + 1 Tbsp
Vanilla essence : 1 tsp
Rose color : 1 tsp (optional)
- Pre heat oven to 200 degrees C.
- Grease a 40X30 cm Baking pan and line it with a butter paper, and then butter and flour the paper. Keep aside.
- Separate two eggs, placing yolks in one bowl and whites in one bowl.
- To the yolks, add the additional yolk, and the remaining two eggs(including whites)
- Add 1/2 cup sugar to the yolks and the whole eggs(in Step 4), and beat on high speed till thick, pale and fluffy.
- Add vanilla essence and color(if using) and beat again for 1 min.
- Sift the flours together.
- Sift half the flour mixture into the egg mixture and fold gently till well mixed. Then add the remaining flour to the batter and fold in.
- Beat the egg whites (in Step 3) on medium speed till it forms soft peaks. Sprinkle in the remaining one tablespoon sugar and beat until stiff peaks form.
- Fold in the whites in to the batter (in Step 8) in two batches.
- Pour the batter in to the prepared pan, spread evenly with a spatula. Tap the pan lightly on the kitchen platform to remove any air bubbles.
- Bake for about 6 to 7 minutes, or till the surface is golden brown.
- Immediately upon removing the cake from the oven sprinkle with confectioners sugar and then invert the cake onto a clean Kitchen towel.
- Remove the parchment paper, sprinkle with confectioners sugar.
- Roll up the cake, starting from the shorter side, along with the towel. Place on a wire rack to cool.
Heavy Whipping Creme : 250 ml
Sugar : 2 Tbsp
Vanilla essence : 1 tsp
- Whip together Creme, sugar and essence till stiff peaks form
Raspberries : 1 cup, coarsely pureed
Sugar : 1/2 cup
Milk or Dark Chocolate chips : 20 gms
- Place the raspberries and sugar in a small saucepan and cook over medium-low heat for about 8 minutes. Stir constantly to prevent burning.
- Remove from heat when the jam has thickened (it will thicken further when cool).
- Stir in the chocolate chips, mix well to combine with the jam. Set aside to cool.
- Unroll the Sponge Cake.
- Spread a layer of whipped cream on the sponge.
- Pipe lines of raspberry jam on the cream.
- Roll up the sponge.
- Wrap it in the baking paper and keep chill in fridge for an hour to set the swiss roll.
- Serve chilled, drizzled with chocolate sauce.

Mom's Tips:
You can make the sponge cake before hand.
While beating egg whites, you can add 1/4th tea spoon cream of tar tar or a small pinch of salt, to get full volume.
You can add whole Raspberries for extra taste while rolling the cake.
The Swiss roll can be filled with any filling like, chocolate ganache, any type of jam or just the whipped creme.
Subscribe to:
Posts (Atom)