Pages

Monday 31 October 2011

Happy Halloween

Halloween1

Wish you all a Very Happy Halloween!!

Halloween2

My son and I together carved this pumpkin. He was very excited about it :-)

Halloween3

This was the first time we carved the pumpkin... and it came out quite well!!

Halloween

Have Fun!!!

Tuesday 25 October 2011

Jeera Spaghetti in Tomato Sauce

JeeraPasta2

I am not a big fan of Italian food.
But my lil one is totally opposite :-) All the nakhras and excuses he gives every day during lunch and dinner just vanish if you place a piece of Pizza or a bowl of pasta before him.
Last week he was down with cold and fever and completely lost his appetite.. So the only way to make him eat was to cook his favorite, Spaghetti!!

What you need :
Spaghetti : 2 fistfuls, makes 4 servings
Onion : 1 small, finely sliced
Garlic : 3 cloves, crushed
Carrots : 1 , chopped
Beans : a fistful, chopped
Peas : 1 cup
Dried Oregano : 1 tsp
Dried Basil : 1 tsp
Kitchen King : 1 Tbsp
Jeera/ Cumin : 1 Tbsp
Salt : to taste
Olive oil : 2 - 3 Tbsp

For Tomato Sauce :
Tomatoes : 3 big, chopped
Onion : 1 small, chopped
Garlic : 2 - 3 cloves, crushed
Basil leaves : a handful
Sugar : 1 tsp
Chilli Flakes : 1 tsp
Salt and Pepper : to taste
Olive oil : 2 - 3 Tbsp

  1. Prepare Sauce : Heat oil in a pan, and add onions and garlic, fry for few mins.
  2. Add Tomatoes, Chilli and Sugar.
  3. Cover and Cook in low heat for about 15 to 20 min, till tomatoes are done.
  4. Add Basil leaves and season with salt and pepper.
  5. Let it cool, and transfer to a blender, and blend to a coarse paste.
  6. For Pasta : Prepare Spaghetti according to instructions and set aside.
  7. In a wide pan, heat oil.
  8. Add Jeera, garlic and onions, fry for few mins.
  9. Add dried oregano and basil.
  10. Now add the veggies(Carrots, peas, beans), season with salt and cook on low till the veggies are done.
  11. Add kitchen King and prepared tomato sauce.
  12. Mix well.
  13. At last add Spaghetti and toss.
  14. Serve hot.

JeeraPasta1

Mom's Tips:
If the tomato sauce yields more than 1 and half or 2 cups, store the remaining in a bottle and keep it in refrigerator. You can store this for about 10 days.
You can add garam masala if you don't have kitchen king.

Thursday 20 October 2011

Strawberry Sauce/Puree

StrawberriesSauce2

Autumn is starting and surprisingly I found some Strawberries in the Farmers market few days back... I wanted to preserve them so that we could have these delicious fruit even during the coming winter months.
I made a sauce out of half of the fruit. It is very simple recipe, and this sauce can be frozen and used when needed.
You can increase or decrease the quantity of sugar and lemon juice according to your taste.

What you Need :

Strawberries : 500 gms
Sugar : 100 gms
Lemon Juice : 2 - 3 Tbsp

  1. Wash the Strawberries, and remove the green stems, and cut into quarters.
  2. Put in the blender or food processor, add Sugar and blend till smooth.
  3. Remove and add lemon juice and mix well.
  4. Store in a jar and freeze.
  5. You can add this as topping on Vanilla ice cream or add it to milkshake.. and Enjoy!!

StrawberriesSauce1

Monday 17 October 2011

Sugar Cookies

Sugar Cookies3

Its been just about more than a month, my mom came... days flew so fast, that its almost time to say good-bye to her. After she came I became one lazy bum.. I guess it will take some time for me to get adjusted to my normal routine.
Shopping and packing is all done, but I wanted to send something homemade for my dad and cousins back in India.... After a lot of thinking, I came up with Sugar cookies.
I never made Sugar cookies before and that too with frosting. I always feel that frosting cookies is an art... just like painting with all those colored icings and piping bags....
The cookies came out really well... and icing was not very bad either, but I guess I have to practice more :-)
The recipe source is from here.

Sugar Cookies1

What you need:

For Cookies:
All purpose Flour : 400 gms
Butter : 225 gms, unsalted, at room temperature
Granulated white Sugar : 200 gms
Eggs : 2, at room temperature
Baking Soda : 1 tsp
Salt : 1/2 tsp
Vanilla extract : 2 tsp

For Icing:
Egg whites : 2, at room temperature
Lemon Juice : 2 tsp
Icing Sugar : 3 cups

Sugar Cookies4

  1. In a clean dry bowl sift together the flour, salt, and baking soda.
  2. In an other bowl, beat butter and sugar until light and fluffy.
  3. Add the eggs, one at a time and beat until combined.
  4. Now add vanilla extract and beat for 1 min.
  5. Add the flour mixture, in batches and beat until you have a smooth dough.
  6. The dough may be sticky and may come up the beater attachments, so beat at slow speed, scraping dough from the sides and from the attachments in between.
  7. Wrap the dough in a plastic wrap and refrigerate for about two to three hour, until firm enough to roll.
  8. Preheat oven to 200 degrees C.
  9. Line two baking sheets with parchment paper.
  10. Remove the chilled dough from the refrigerator and, take half of the dough and put the reaming half back in the refrigerator(because it is easy to work with small quantity of the dough)
  11. On a lightly floured surface, roll out the dough to a thickness of 1 cm.
  12. Making sure that the dough does not stick to the counter, keep turning the dough as you roll.
  13. Cut out desired shapes using a lightly floured cookie cutter and transfer to baking sheet. Place the baking sheets with the unbaked cookies in the refrigerator for about 15 minutes to chill the dough and prevent from losing their shape while baking.
  14. Bake cookies for about 8-10 minutes (depending on size). Mine took exactly 8 mins.(just until the edges start to brown)
  15. Remove from oven and cool them on a wire rack.
  16. Enjoy them as it is or frost with icing.
For Icing:
  1. Sift Icing sugar to remove any lumps.
  2. In the bowl beat the egg whites with the lemon juice, with the hand mixer.
  3. Add the sifted sugar and beat on low speed until smooth.
  4. Add more sugar or water to get the right consistency.
  5. Add food coloring, if desired.
  6. The icing needs to be used immediately or put in an airtight container as it hardens when exposed to air.
How to Frost:
  1. I made icing with 2 types of consistencies.
  2. One little thick with which I piped the edges, and then with the icing of flowing consistency(lil thin) I filled the inside using a spoon.

Sugar Cookies5

Mom's Tips:
Using disposable piping bags is helpful when using more colors.
When frosting, let the edges dry, before filling with thin consistency icing.
I found this wonderful site which shows how to frost cookies, If interested have a look.

Wednesday 12 October 2011

Mango Cheesecake

Mango CheeseCake2

Its been raining here from past one week and the temperature has dropped to around 15 degrees and some days even less, and the worst part is the wind. The cold freezing winds blowing all day long.
We removed the winter clothes, sweaters, pullovers and jackets from the bottom racks... the autumn is here and winter is not very far.
The starting of autumn and winter is very depressing, I miss the sun, the warmth.

So to make us feel better, I baked this cheesecake last weekend. You all must know how much we love mangoes, in this post. So I have mixed my two loves, mangoes and cheesecakes and the result was divine taste.

Mango CheeseCake4

What you need:

For the Crust:
Graham Cracker Crumbs or any mild sweet cookies : 100 gms
Almonds ground to powder : 75 gms
Sugar : 2 Tbsp
Butter : 3 Tbsp

Cheesecake Batter:
Mascarpone : 250 gms
Sugar : 100 gms
Eggs : 3, at room temperature
Vanilla Extract : 1 tsp
White Chocolate : 100 gms (optional)
Mango Pulp : 250 gms

Mango Gelee:
Mango pulp : 2 cups
Gelatin : 3 sheets
Sugar : 2 Tbsp

Mango CheeseCake1

  1. To prepare the crust: Blend all ingredients together in a food processor and press it onto the bottom of 9" round spring-form pan and bake for about 12 minutes or until slightly brown. Keep aside to cool.
  2. Cheesecake will shrink as it cools. Generously greasing the sides of the baking pan before pouring in batter will allow the cake to pull away from the pan as it cools and shrinks instead of pulling apart from the middle.
  3. To prepare the cheesecake batter: Whip mascarpone, vanilla extract and sugar until smooth. Make sure that there are no lumps, before you add the eggs.
  4. Add the egg, one at a time. Whip well for 1 or 2 mins on medium speed.(Over-beating incorporates additional air and tends to cause cracking on the surface of the cheesecake). Keep the beater aside.
  5. Melt the white chocolate(if using) and with a rubber spatula, mix it into the batter.
  6. Now, add the mango pulp and mix well.
  7. Pour onto the prepared crust.
  8. Bake in waterbath(wrap the bottom of your springform pan in aluminum foil and place it in a larger pan with water in it, just halfway up the outside of the springform pan) at 210 degrees C for about 40 minutes(+ or - 10 mins : every oven is different so check in between), or until the edges are set but the center is slightly jiggly when shaken gently.
  9. After about 40 minutes, turn your oven off and leave the cheesecake inside the turned off oven for another 30 mins. Cool at room temperature with a plate or cookie sheet inverted over the spring form. (loosen the cake from the edge of the pan by running the tip of a knife between the cake and the side of the pan.)
  10. For the Mango gelee: Dissolve sugar in the mango pulp. Soften gelatin in half cup water. Squeeze and add it to 1/2 cup of warm water. Stir until gelatin is dissolved. Add it to mango pulp.
  11. After the cake has cooled, pour the prepared mango gelee on the top.
  12. Refrigerate overnight and serve chilled.


Mango CheeseCake3


Mom's Tips:
A spring-form pan (with removable side and bottom) is the most preferrable pan for making cheesecakes.
Avoid over-baking. The cheesecake will continue to bake after it is removed from the oven. The center of the cheesecake should be just slightly moist when it is ready to be removed.
Bake the cheesecake in a water bath to keep the oven moisture high and the heat gentle.

Sunday 9 October 2011

Cinnamon Rolls

CinnamonRolls1

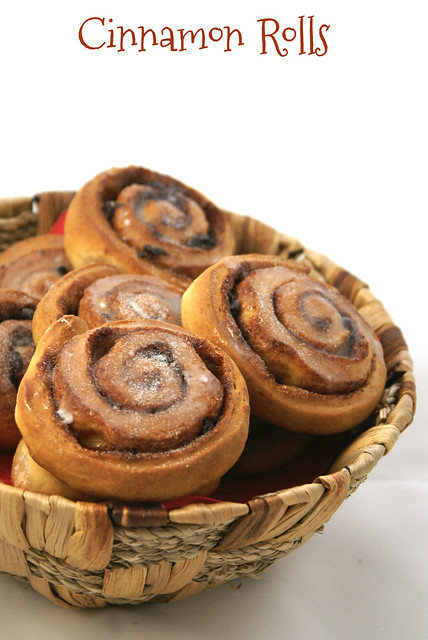
I have always loved the flavor of Cinnamon. So it is obvious that Cinnamon Rolls are my weakness :-) Its like a burst of flavor in every bite.
I always shied away from making these beauties, as I always thought its very difficult to make and I was afraid to experiment with yeast.
But this time I had that strong craving... and I wanted to make these..
Trust me... it is not as difficult as I have assumed. Yes, it is time consuming.. but not difficult.
I cannot say that these look very perfect, but for a first attempt it is decent :-)

What you need :
For the dough:
All Purpose flour : 2 1/2 cups
Instant yeast : 1 Tbsp
White granulated Sugar : 3 Tbsp
Salt : 1/2 tsp
Vanilla Extract : 1 tsp
Milk : 3/4 cup
Butter : 30 gms
Egg : 1, large
For the filling:
Light Brown Sugar : 1/2 cup
Ground Cinnamon : 2 Tbsp
Raisins : 1/2 cup (Soak in warm water for about 15 mins, drain and gently squeeze to remove excess water with a paper towel) - optional
Honey : 2 Tbsp - optional
Butter : 1/2 cup, unsalted, just about melted
For the icing:
Icing Sugar : 2 cups
Milk : 2 to 3 Tbsp
Vanilla extract : 1/2 tsp

  1. In a large bowl, combine 1 and 1/2 cups of the flour, the instant yeast, sugar, and salt.
  2. In a small saucepan over low heat, warm up the milk, butter (just warm, not hot). It's fine if the butter doesn't fully melt. Pour this into the flour mixture.
  3. Add in the egg and the vanilla extract.
  4. Using an electric mixer, beat at low speed just until moistened, then beat for 3 minutes at medium speed.
  5. Put the beater aside, and by hand, using a wooden or rubber spatula, stir more flour in gradually until you've made a soft dough.
  6. Turn the dough out onto a floured work surface and knead it by hand until it feels smooth and elastic (around 5 mins)
  7. Place the dough in a lightly greased bowl and cover.
  8. Let the dough rise in a warm spot until doubled. (about 1 to 1.5 hrs)
  9. While the dough is raising, prepare the filling : In a medium size bowl, mix together sugars and the salt. Mix in the raisins. Add Honey and stir to combine. Set aside.
  10. Butter the bottom and sides of a pan.
  11. When the dough has risen sufficiently, turn it out onto a lightly floured work surface, and use a rolling pin to roll it into a rectangle.
  12. Use a pastry brush to spread the melted butter all over the dough.
  13. Sprinkle all of the filling evenly over the dough, leaving about one inch uncovered at the farthest short side of the dough.
  14. Starting with the short side, carefully roll up the dough. It needs to be snug but not too tight.
  15. Seal the edges.
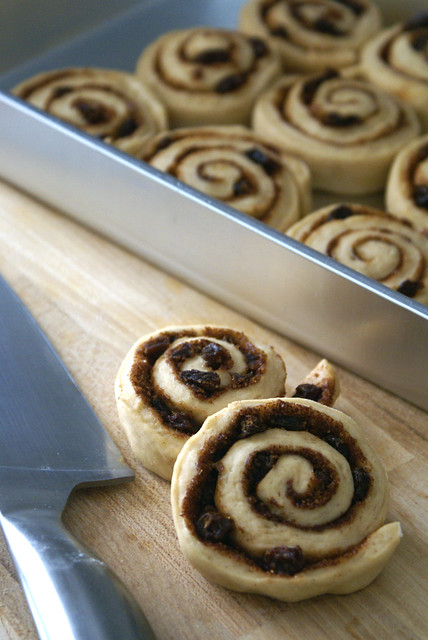
  16. Using a sharp, smooth knife cut the dough into of even thickness.
  17. Place them, cut side down, evenly spaced in the pan.

CinnamonRolls3


18. Cover the pan with lightly greased plastic wrap. Place it in a warm spot to rise. (about 30 mins)
19. When the rolls are raising: Pre-heat the oven to 200 degrees Centigrade.
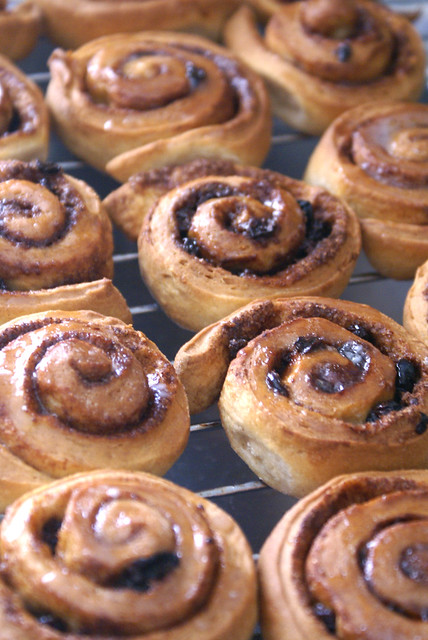
20. When the rolls have doubled in size, they are ready to go into the preheated oven. Bake them for approximately 25 minutes, until they're golden brown.
21. When the rolls are in oven, make the icing : In a small bowl, stir together the icing sugar, milk, vanilla extract. Stir until all the lumps dissolve. If you'd like the icing thinner or thicker, adjust it with a bit more sugar or milk. To drizzle it on, make it on the thinner side. To smooth it on like frosting on a cake, make it a bit thicker.
22. As soon as the rolls come out of the oven, brush some melted butter over them.

CinnamonRolls4

23. Drizzle rolls with the already made Sugar Glaze.
24. They are best when served warm. As a matter of fact they don't last by the time they cool :-)

And the Verdict:

These sticky lil treats are worth all the effort. Both my men savored them as dessert and even as breakfast the next day!!

CinnamonRolls2