Pages

Monday 29 October 2007

Layered Parotta with Aloo Gobi


Porotta
Layered Parotta


I like long car journey's, ... becoz we get to stop at Dhabas for lunch and dinners :)
I enjoy Dhaba food, esp, sitting on the cots and having garma garam food and lassi :), and one of my favorite is the parotta, which is served with some gravy or dal.
Once me and my mom, observed the way the cook at the dhaba, works on the dough and tried at home, but it was never a success.
Recently I have come across this blog here, which showed the step by step process. This has come out very well, just like the parottas, made by a profi.

Parotta:
Ingredients:
Maida: 2 cups
Sugar: 1 tsp
Salt: to taste
Luke warm water: as needed
Oil: while kneading(1Tbsp) and while rolling(as needed).
Eggs: 1 (optional)

How I did it:
  1. Mix all the dry ingredients in a big bowl and add eggs(if using).
  2. Knead to form soft dough adding sufficient water and oil.
  3. Cover with a wet muslin cloth and keep it aside for 1 hr.
  4. Divide the dough into equal portions of size of a small.
  5. Take a portion and apply some oil on it.
  6. On a flat platform apply some oil and roll out the portion to the maximum, as thin as possible and do not worry about the shape.
  7. Now fold it, just like making pleats of a saree, and roll it spirally.
  8. Repeat this step for all the portions.
  9. Heat the tawa, and roll out each portion in the shape of a roti and fry on hot tawa on both side, applying little ghee or oil.
  10. Serve Hot!

Porotta with AlooGobi
Parotta, served with AlooGobi


Aloo Gobi:
Ingredients:
Aloo: 4 big, chopped
Gobi: 1 medium, chopped into medium florets
Onions: 2
Ginger Garlic paste: 1 Tbsp
Garam Masala: 1 tsp
Green Chillies: 4, slit length wise (adjust accordingly)
Haldi: 1/2 tsp
Salt : to taste
Corriander: 1 small bunch, chopped
For Tadka:
Cumin seeds: 1 tsp
Mustard seeds: 1 tsp
Dry Red Chillies: 2
Oil: 2 Tbsp

Method:
  1. Heat oil in a kadai, and add the ingredients for Tadka.
  2. Add Onions and green chillies, and fry till golden.
  3. Add ginger garlic paste and haldi and fry for few more mins.
  4. Now add aloo and gobi and salt and cook covered for 10 mins.
  5. Add Garam Masala, and cook for few more mins till done.
  6. Garnish with corriander and serve hot!

AlooGobi with Parotta

AlooGobi with Parotta


And the Verdict:
It is long, time consuming process, but the end result is very satisfying... its worth all the hardwork done :)


Monday 22 October 2007

Saffron Rice

Apart from Jeera Rice, Saffron Rice or Kesar Chawal goes well with the wide variety of spicy Indian dishes. It is also very appealing to the eye, with its pleasant color.
As someone rightly said "White rice is nice, but yellow saffron rice is stunning".

SaffronRice1
Saffron Rice


There have been many versions of Saffron Rice, from the day Think Spice... Think Saffron was announced :) And now this is the time for my version :)

Ingredients:
Basmati rice: 1 cup
Water: 2 cups
Saffron: 1/2 tsp
Cloves: 4 - 5
Cardamom: 2
Cumin: 1 tsp
Cashews: 1 Tbsp
Salt: to taste
Milk: 2 Tbsp
Curry Leaves: a few
Ghee: 1 Tbsp
Edible Saffron Color or Turmeric : a pinch (optional)

How I did it:
  1. Steep Saffron in warm milk for a few mins.
  2. Cook rice with water, cardamom, cloves, salt. Add even the saffron and milk and turmeric or color(if using).
  3. Take ghee in a small kadai and add cashews after golden, add jeera and curry leaves.
  4. Add this to the cooked rice.
  5. Serve hot!

SaffronRice2

Saffron Rice


And the Verdict:
It is a nice substitute for the routine jeera rice or ghee rice. Saffron adds the rich flavor and color.
I served this with butter chicken, and it was a nice combination!!

RiceandChicken

Saffron Rice with Butter Chicken


Food Event:
This is my entry for the Think Spice : Saffron event being hosted by dear Sunita of Sunita's World.


Thursday 18 October 2007

Butter Chicken / Chicken Makhani

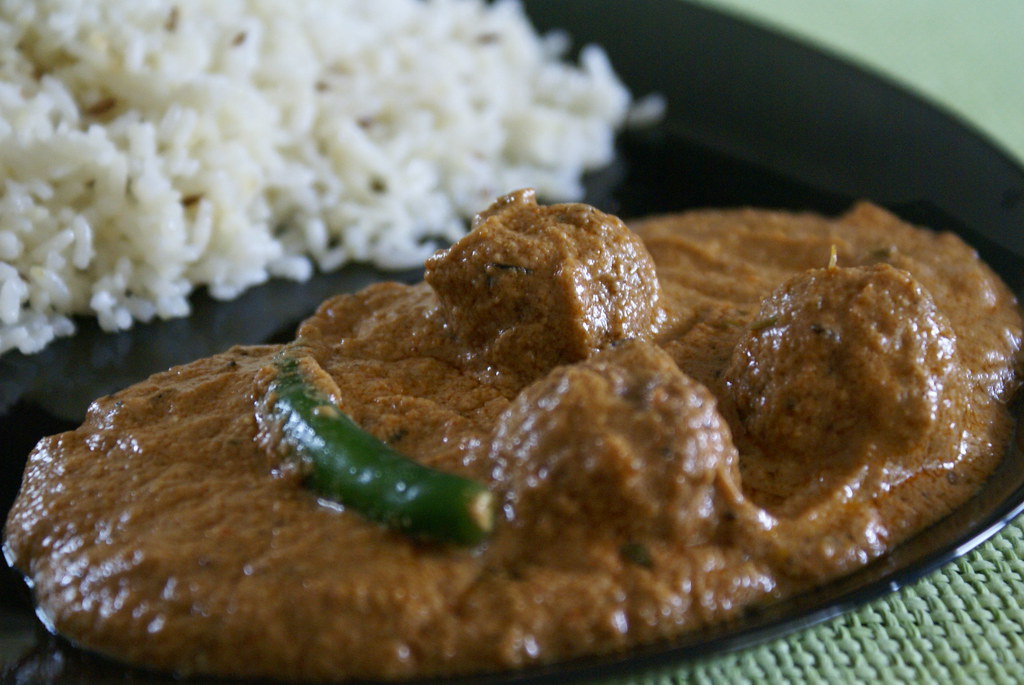
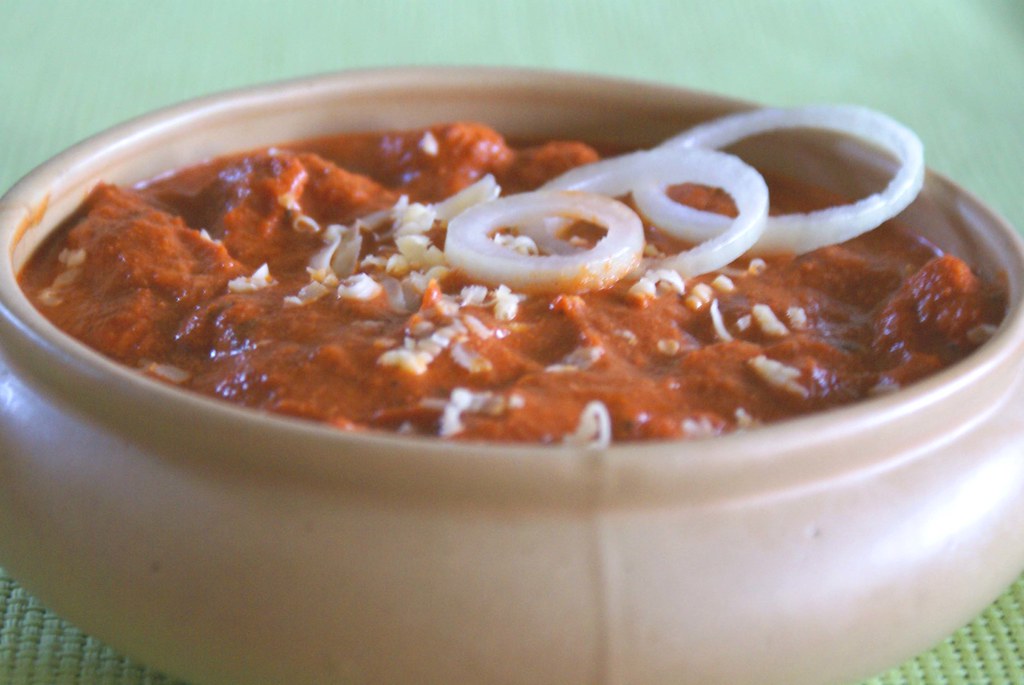
One of my colleague/friend from Prague, visited us for dinner yesterday, and I had to prepare something which is mild, with less spices, as suitable to his taste buds!
Then the dish which came into mind was Butter Chicken... it is so mild and tasty at the same time. One advantage in this recipe is that, it can be made as mild or as spicy as one wishes without altering the actual taste.
This dish is among the best known Indian foods all over the world.
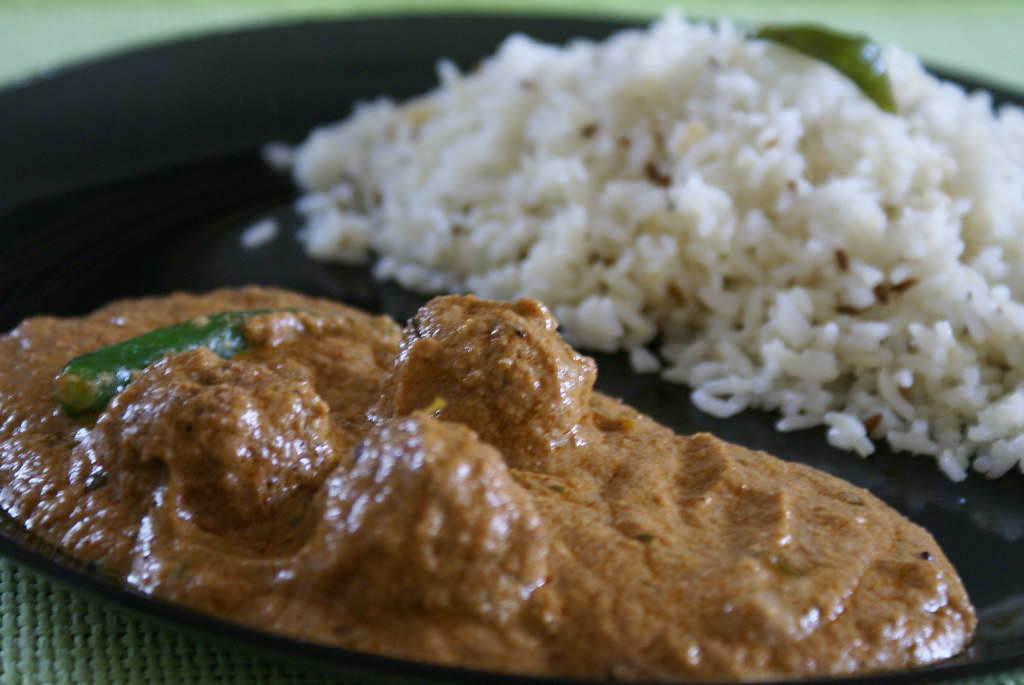
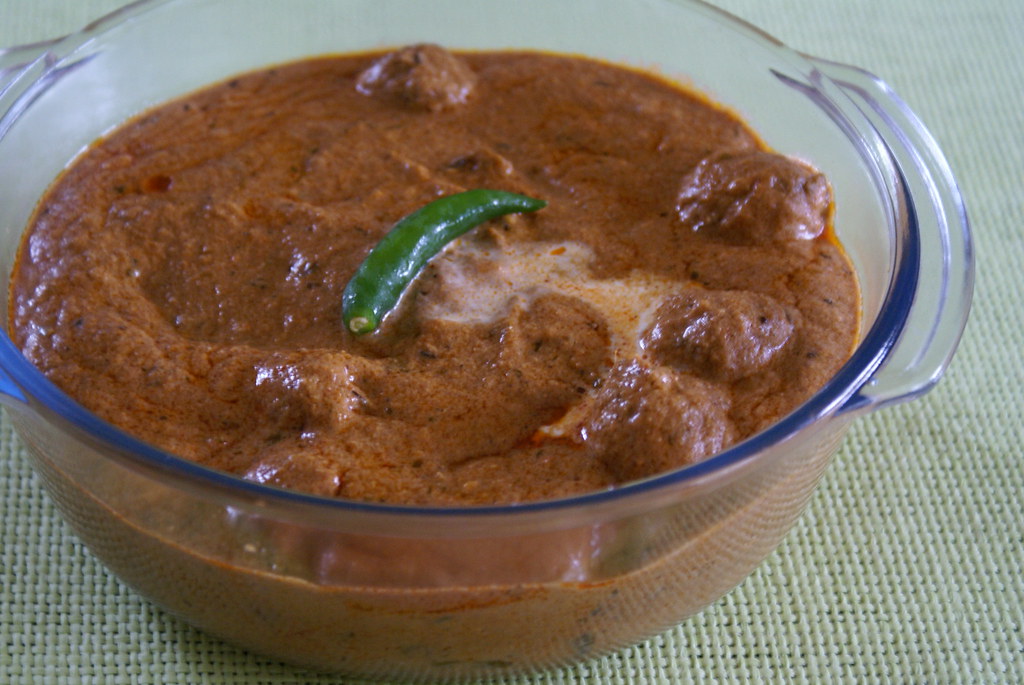
ButterChicken2
Butter Chicken/Chicken Makhani


I have adapted this recipe from chef Sanjeev Kapoor's popular food show "Khana Khazana" on Zee TV :) From the time I was little young, I used to sit in front of TV, by the time the program starts, with a pen and paper and note down the ingredients and method carefully :) I really like the way he makes the show and recipes interesting!!
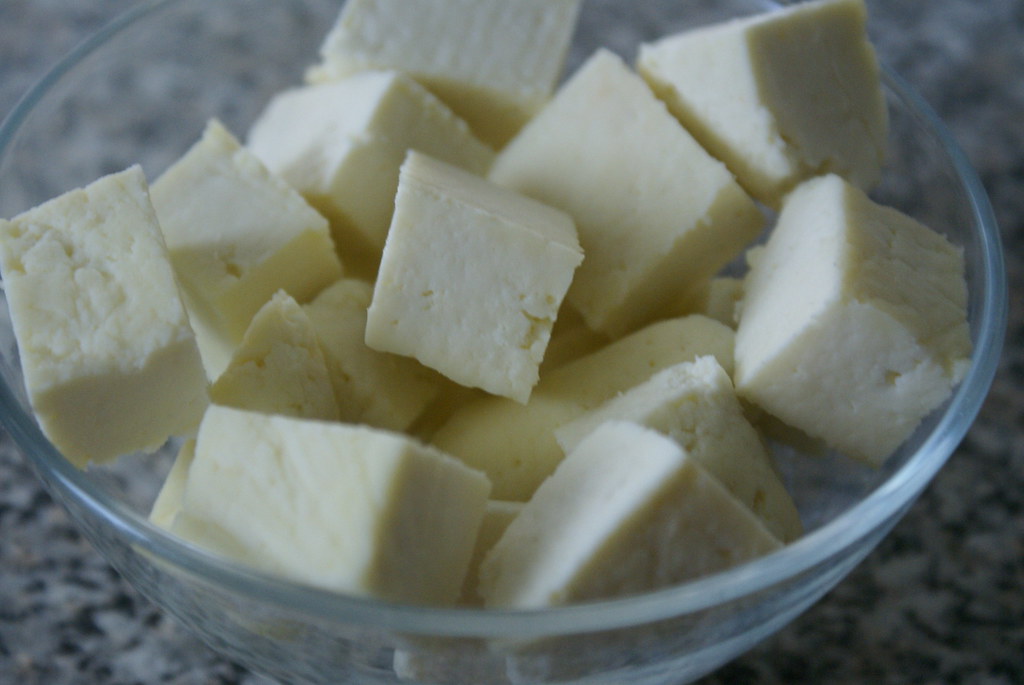
Ingredients:
Chicken, boneless: 800 gms
Kashmiri red chilli powder: 1 tsp, adjust accordingly
Lemon juice: 1 tbsp
Salt: to taste
For Makhani gravy
Ginger Garlic paste: 1 Tbsp
Green chillies: 2, chopped, adjust accordingly
Butter: 3 Tbsp
Green cardamoms: 2-3
Cloves: 4-5
Cinnamon: 1 inch stick
Tomato puree: 400 gms
Red chilli powder: 1 Tbsp, adjust accordingly
Garam masala powder: 1/2 tsp
Salt: to taste
Honey: 2 Tbsp
Kasoori methi: 1/2 tsp
Fresh cream: 1 cup
Red Food Color: a pinch
For Marination
Ginger Garlic Paste: 1 Tbsp
Yogurt: 1 cup
Kashmiri red chilli powder: 1 tsp
Salt: to taste
Lemon juice: 2 tbsps
Garam masala powder: 1/2 tsp
Butter: 2 tbsps

How I did it:

  1. Apply a mixture of red chilli powder, lemon juice and salt to the chicken and leave aside for half an hour.
  2. Hang yogurt in a muslin cloth for fifteen to twenty minutes to remove extra water.
  3. To this add red chilli powder, salt, ginger-garlic paste, lemon juice, garam masala powder and butter.
  4. Apply this marinade to the chicken pieces and refrigerate for three to four hours.
  5. Put the chicken onto a skewer and cook in a preheated oven at 200°C for ten to twelve minutes or until almost done.
  6. Remove and keep aside, for further use.
  7. Heat butter in a pan. Add green cardamoms, cloves and cinnamon.
  8. Saute for two minutes, add ginger-garlic paste and chopped green chillies.
  9. Cook for two minutes. Add tomato puree, red chilli powder, garam masala powder, salt, red food color and one cup of water.
  10. Bring to a boil. Reduce heat and simmer for ten minutes.
  11. Add honey and powdered kasoori methi.
  12. Add cooked tandoori chicken pieces.
  13. Simmer for five minutes and then add fresh cream.
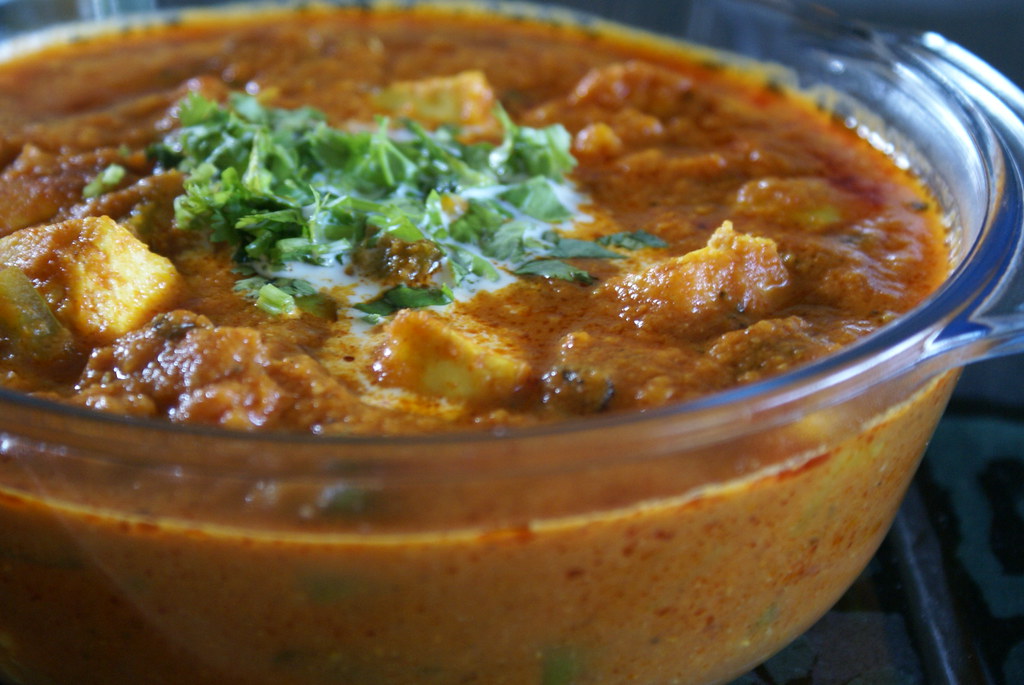
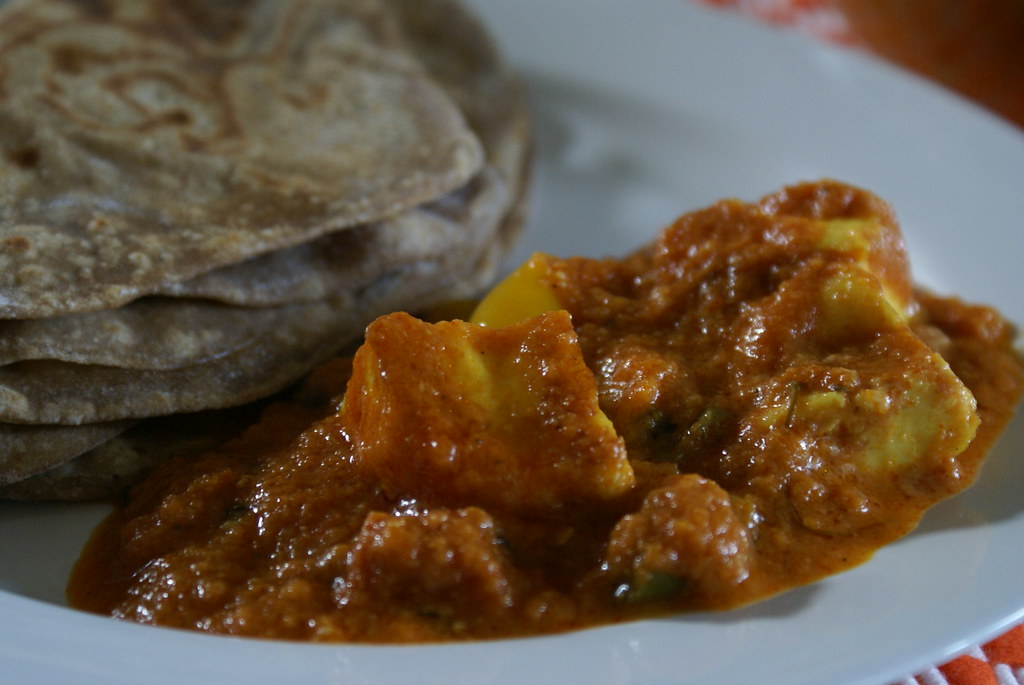
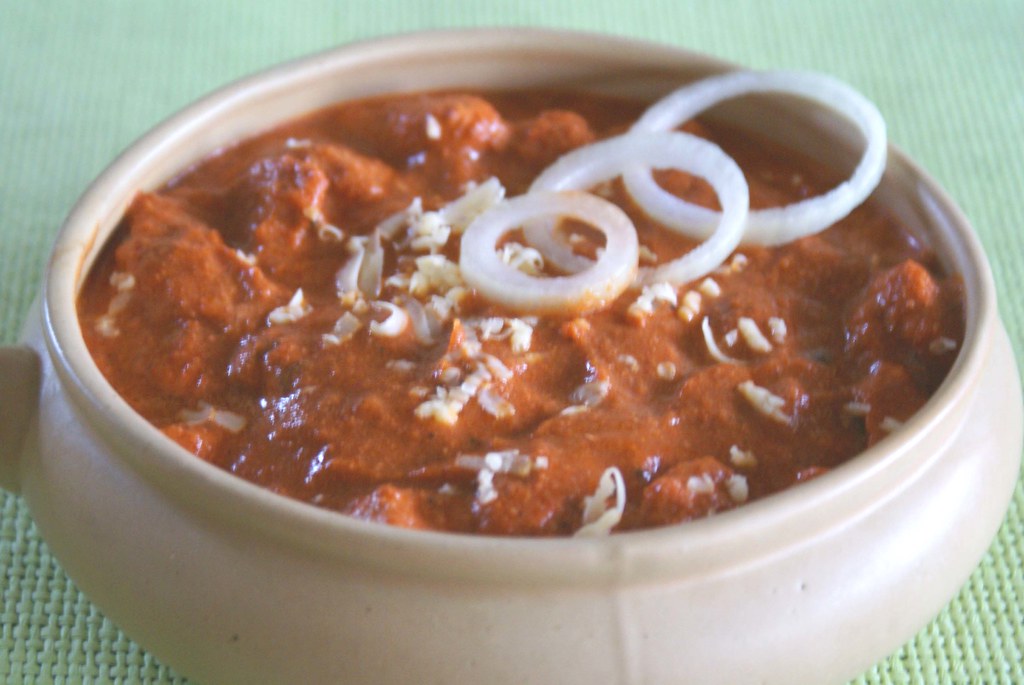
  14. Serve hot with Naan, Parantha or Steamed Rice.

ButterChicken1
Butter Chicken/Chicken Makhani


And the Verdict:
My guest was all pleased, and he loved the chicken. It was mild and tasty and finger licking :)

Please DO take a moment to read the following :

Feed A Hungry Child - Donate Smiles:


Feed A Hungry Child is a non-profit organization formed by V.K. Narayanan of My Dhaba. This is a mission to come together and fight against Poverty and Hunger. Visit this page to learn more.

What is it All About :

feedahungrychild.org is a not-for-profit charitable organization formed in a collaborative effort of the like-minded people from all around the world. It aims to replace the empty plates of the underprivileged children and replace them with ones of food. While FAHC addresses the holistic needs of each children it supports, it believes illiteracy, malnutrition, and other concerns can only be addressed when hunger is appeased.

Immediate Mission:

* Join the fight against global poverty.
* Help feed hungry children one by one.

Larger Vision: feeahungrychild.org aims to improve the lives of a good many underprivileged children in their efforts to support themselves, their families, and their communities by giving them the chance for better food, better education, better healthcare, and other welfare.

How can I help? With the help of volunteers, FAHC has begun its support to a pilot batch of 14 children and their families since April 2007 out of which 8 children are girls. Please see the event report for details. This year we are also fundraising to support more children, so would be extremely grateful of any help or contributions you can give to FAHC. Funds from FAHC programs go directly to the children and their families. We do not have any paid employees or any other direct administrative expenses.


This year FAHC is also fund raising to support more children by “Donate Smiles” drive and the goal is to raise $3,360 by October 23, 2007.

If you want to make a one time donation, click on the ChipIn widget below to donate securely via PayPal online. You can win some fabulous prizes for the donations equal to or more than $25.
More info on prizes click here


So Chip In and Spread Smiles!!!

Updated on 25th October:

A big Thanks to every who participated in this noble cause, and gave donations generously!!! I congratulate all the volunteers who encouraged this act and who sponsored the gifts.

Please click here to know about the results and the winners!

I once again Thank everyone who made this a big success!!


Monday 8 October 2007

Pickled Deviled Eggs and "Egg Mice"!!!


Deviled Eggs1
Pickled Deviled Eggs and "Egg Mice"


When dear fellow bloggers Jai and Bee announced the new event "CLICK", I was very much excited. But the theme, i.e., EGGS made me think!! How can one get a creative idea out of eggs? An egg is an egg, white and oval, in what ever angle you try to take a picture of it :)
When I asked a dear friend of mine for an idea, the answer was, "I can't think of anything except boiling it and cutting into half and swallowing :)"

Hmmm... tough, it was for me, becoz I am not good with camera, and I was whiling away the time drooling over the lovely entries sent by my fellow bloggers here.

When I put on the thinking cap, many ideas flashed... and I decided to go with this - Pickled Deviled Eggs!!!


Deviled Eggs5
Pickled Deviled Eggs


Ingredients:
Hard Boiled Eggs: 4, peeled
Beetroot and Red Cabbage: 1 cup each, chopped
Water: 2 + 2 cups
Vinegar: 1/4 + 1/4 cup
Cloves: 5 + 5
Cinnamon: 1 inch
Salt: 2 + 2 tsp
For Deviled Eggs:
Mayonnaise: 2 Tbsp
Dijon Mustard: 1 Tbsp
Pepper ans Salt: to taste


Deviled Eggs3
Pickled Deviled Eggs and "Egg Mice"


How I did it:
  1. Boil the Beets and Cabbage in separate vessels, with all the ingredients.
  2. Simmer for 30 mins.
  3. Sieve them into 2 dry jars, and let them cool.
  4. Now add 2 eggs in each jar, cover and leave it in the fridge overnight.
  5. You get pink eggs (from beets) and blue eggs (from cabbage).
  6. For the Deviled eggs:
  7. Cut the eggs into half and scoop out the yolks.
  8. Mash the yolks with a fork or spoon, add Mayonnaise, Mustard, Pepper and salt and whisk till smooth.
  9. Fill the eggs with this and serve.

To Make Egg Mice:
  1. Take a peeled hard boiled egg and cut off a thin slice from one side.
  2. Cut out 2 "V" shapes for "Ears" from that slice.
  3. Make a cut on the top to insert the ears.
  4. Draw the eyes with tomato ketchup and the whiskers with mustard and pierce a clove at the back for the tail.


Deviled Eggs2
Pickled Deviled Eggs and "Egg Mice"


And the Verdict:

The platter looked so attractive and colorful. It is even ideal as a center piece on a dining table during dinners or parties.
Kids will with no doubt enjoy these!!

Food Event:
This is my entry for the CLICK event being hosted by dear Jai and Bee of Jugalbandi.


Friday 28 September 2007

Gaarelu / Vada

Gaarelu is synonymous with the word Festival or Guests. When we were kids Amma used to make them only during festivals or when any special guests are visiting us!!!
Gaarelu/Vada/Ulundu Vada is a very famous South Indian breakfast which is accompanied with Coconut Chutney and Sambhar.
Everyone in our family likes these... hope even you will enjoy them :)


Gaarelu
Gaarelu


Ingredients:

Whole urad dal: 2 cups
Ginger: 2 inch, finely chopped
Green chillies: 4, finely chopped
Onion: 2, finely chopped
Salt: to taste
Oil: for deep frying

Method:

  1. Soak Urad Dal in enough water overnight.
  2. Grind into a soft paste, using very little water. The batter should be very thick, not like dosa batter.
  3. Add ginger, onions, chilies and salt to this and mix well.
  4. Take a deep pan or kadai and heat oil for frying.
  5. Wet your hands and take a lemon sized ball and flatten it and make a hole in the center. (You can use a plastic sheet or a banana leaf, to make things easier).
  6. Slowly put it in oil and deep fry on both sides till golden brown.
  7. Serve hot with coconut chutney or sambhar or even chicken curry!!


Garelu with kobbari pachadi
Gaarelu with Coconut Chutney


Notes:
  1. If excess water is added while grinding, it is difficult to shape and drop it in oil.
  2. Every time before taking batter into your hands, remember to wet your hands with water. This prevents the batter from sticking to your hand.
  3. Since you wet your hands each time and put them in the bowl containing the batter, after some time, the batter is likely to become thin. So it is better to work on the batter batch wise.

And the Verdict:
"Thinte Gaarelu thinaali, vinte Bhaaratam vinaali" is a very famous telugu proverb. And this says it all!!!

Thursday 27 September 2007

Paneer Butter Masala

"Paneer Butter Masala", the most common name in almost all the menu cards of all the Indian restaurants, and the most common item which people tend to order :) and I am one of them.
All the paneer dishes sound so delicious and exotic. And everyone agrees with me, so have you ever tried making Paneer at home? If the answer is "No", then you must surely try it.
Making Paneer at home is not only easy but also fun. There is a satisfaction and happiness when we cook dishes with Paneer made at home :)
The process of making paneer is very simple. All we need is, Milk, Half a Lemon, a Big pot and a clear Towel.
I have explained the process of making it here.


Paneer Butter Masala1
Paneer Butter Masala


Coming to the recipe...

Ingredients:

Paneer: 250gms
Tomatoes: 3, chopped
Onions: 3, chopped
Garam Masala: 1 tsp
GingerGarlic Paste: 1 Tbsp
Cashew Nuts: Fistful, soaked in water for 15 mins and grind to get a smooth paste.
Dry Red Chilies: 5, adjust acc. to your taste buds
Corriander leaves: 1 small bunch
Mint leaves: a few
Kasoori Methi: 1 tsp
Salt: To taste
Cream: 2 Tbsp
Oil: 3 Tbsp
Water: 75 ml

How I did it:
  1. Take a deep saucepan, and add water, tomato, onion, dry red chilies, mint leaves. Cover and boil till done.
  2. Keep aside to cool. Then grind them and sieve to get the masala paste.
  3. Heat a little oil and fry the paneer pieces and keep aside for further use.
  4. Heat oil in a wide heavy-bottomed pan.
  5. Add the ginger garlic paste and fry till the raw smell disappears.
  6. Add cashew paste and fry for few more mins.
  7. To this add the masala paste, salt and cook covered on medium flame, stirring in between for 15 to 20 mins.
  8. Add the paneer pieces and Garam Masala and cook for 5 more mins.
  9. Finally add kasoori methi and cream. Garnish with coriander leaves
  10. Serve hot with Rotis, Jeera Rice or Ghee Rice.

Paneer Butter Masala2
Paneer Butter Masala


And the Verdict:
Rich and Creamy!!!
"The way to Man's heart is through his Stomach", serve it to your loved one, and may what your wish be, it will be fulfilled in seconds ;)

Other Paneer dishes posted Kadai Paneer.

Monday 24 September 2007

Paramannam(Sweet Rice Pudding)

In India the word festival is synonymous with the word excellent food. There is no celebration considered complete unless and until rich food is served among friends, family and relatives. Lots of cooking of good quality food is done and served on festival days.
This dish is prepared as an offering to God in every home and temple of south India on any festive occasion like this.

Payasam2
Paramannam


I made this on Ganesh Chaturthi, and it was loved by every one!

Ingredients:
Rice: 1 cup
Milk: 4 cup
Jaggery: 1 cup
Cashew Nuts: fistful
Raisins (Seedless): 1/4 fistful
Cardamom (powder): 1/2 teaspoon
Clarified Butter(Ghee): 1/2 tablespoon

How I did it:

  1. Wash and soak rice in two cups of water for about fifteen minutes.
  2. In a small sauce pan, bring to boil half a cup of water and crushed jaggery. Lower heat and slowly simmer until the syrup is sticky (if a drop is taken between the thumb and fore finger, it should feel sticky but not stretch out like a thread).
  3. Remove from heat and keep aside.In another sauce pan, bring milk to a boil.
  4. Drain water from the rice and add to the milk. Lower heat to medium and cook until the rice is done and the mixture looks thick.
  5. Remove the sauce pan and allow to cool for a minute or two. And now add the cooled jaggery syrup from the smaller sauce pan. Stir well. Keep aside.
  6. Now, in a small skillet heat clarified butter/ghee and when hot, add cashew nuts. Fry for a minute or two until the nuts change colour to pale brown. Add raisins and stir for a minute.
  7. Remove from heat and pour the contents of the above skillet into the sauce pan containing rice mixture. Also, stir in cardamom powder. Keep covered for two minutes.
  8. Serve hot along with melted clarified butter on the side.

Payasam1
Paramannam


Additional Information:
Occasionally, when jaggery syrup is added to the rice mixture, the milk splits. This could be because of two reasons:
  1. The jaggery is adulterated.
  2. The rice mixture is too hot and when mixed with jaggery syrup results in the milk splitting. Hence, it is advised to add jaggery syrup to rice only after it has been allowed to cool for a minute or so.

And the Verdict:
It is enjoyed by people who have a sweet tooth like me :)
Utterly delicious!!!

Food Event:
This is my entry for the Ganesh Chaturthi event being hosted by Latha of The Yum Blog.


Friday 21 September 2007

Minty Pea Rolls - Improved :) :)

Mint Pea Rolls2
Minty Pea Bread Rolls


I made these bread rolls few days back here, and was quite upset with the shape of the rolls though the taste was pretty good. But as they say, the dish must a treat to both eyes and tummy. So I wanted to try my hand on them once again... I usually can't stay steady with out getting the things perfect :)

I had the left over mint pea stuffing in the fridge, so I made the bread rolls for breakfast again.

Mint Pea Rolls1
Minty Pea Bread Rolls


This time, they were just perfect. A treat to both eyes and tummy :) :)
Now I believe that "Practice Makes a Man Perfect"!!!

Mint Pea Rolls3
Minty Pea Bread Rolls


My husband calls me a perfectionist :) How many of you are perfectionists?? :)

Thursday 20 September 2007

Hyderabadi Lamb(Mutton) Kheema Kofta Curry - Meat balls in Cashew Rich Gravy

I have been busy lately and now I am back to the normal routine with cooking, taking pics and blogging.
I have been facing tantrums at home from J, saying that I am cooking merely for blogging and not for him :) and also complains that my camera gets the first chance to capture my dish. I guess this is a common argument in many of your homes too.

KheemKoftawithGheeRice1
Kheema Kofta with Ghee Rice


J was craving for kheema koftas from past one month and because of my busy schedule could not meet the household demands :)
To those who dont know Koftas are popular throughout India. They are made using fine lean mince which is blended with herbs and spices and made into balls.

This dish sounds exotic and tastes it too! Add it to a dinner party menu and your guests will end licking their fingers :)

Ingredients:
Ground Lamb meat(Kheema): 1/2 Kg
Onions: 2, minced
Tomato Puree: 1 cup
Green Chilles: 5, adjust acc. to your taste buds, slit length-wise
CashewNuts, Chironji and WaterMelon seeds: 1 cup, soak in water for 1 hr and grind to smooth paste
Jeera/Cumin seeds: 1 tsp
Cloves: 5
Cinnamon: 2 inch stick
Red Chilli Powder: 3 tsps
Garam Masala: 2 tsp
Lemon juice: 2 Tbsp
Ginger Garlic Paste: 2 Tbsp
Oil: 3 Tbsp + extra for frying
KasuriMethi: 1 tsp
Sour Cream: 1 Tbsp
Water: 200 ml/ 2cups
Salt: to tsate

KheemaKofta
Kheema Kofta Curry


How I did it:
  1. Marinate kheema with lemon juice, 1 tsp salt, half of Ginger garlic paste, red chilli powder. And keep aside for 2 to 3 hrs, or refrigerate overnight.
  2. Heat oil for frying in a kadai, shape the kheema into koftas, shape and size as desired and deep fry them. Keep aside for further use.
  3. For the Gravy:
  4. Heat oil in a wide heavy bottomed saucepan.
  5. Add jeera, minced onions and green chillies and fry for few mins, till the raw smell of the onions disappears.
  6. Add ginger garlic paste and fry for few more mins.
  7. Add red chilli powder, garam masala and tomato puree and salt.
  8. Cook covered for 15 mins, stirring in between.
  9. Add cashewnut paste, and water. Cook again for 15 more mins, stirring in between.(be careful the gravy bloops up)
  10. Add kasoori Methi, cream and stir.
  11. Add the koftas and cook on low for 10 mins.
  12. Remove from heat, Serve hot with Ghee Rice or Rotis.


KheemKoftawithGheeRice2
Kheema Kofta with Ghee Rice


And the Verdict:
Truely Hyderabadi!!
Creamy and rich gravy reminds of shahi and mughlai dishes!!
And very fulling and heavy meal, and please don't count the calories.
Not for people on diet :D

Tuesday 18 September 2007

Minty Pea Bread Rolls!!

When dear Coffee of The Spice Cafe announced the theme of Monthly Blog Patrol(MBP), this month which is making bread from the scratch using the recipe from fellow bloggers, I have been very busy browsing through all the my favorite blogs searching for recipes. And in that process I came across a very nice blog Bake My Day, where I found so many nice recipes for bread, and the one which attracted me was the Minty Pea Bread.

Stuffed Bread Rolls
Stuffed Bread Rolls


This was my first experiment with yeast, and I was worried about the output. But luckily it was not that bad. The bread rolls came out to be delicious with hard crust and soft insides with herb flavored filling. We had it for dinner and it got a lot of appreciation :)

But I guess I need to improve on the shaping of the bread roll!! This is the recipe with little modifications according to our taste.

Ingredients:
For the Bread(Dough):
All Purpose flour: 500 gms
Whole wheat flour: 150 gms
Active Dry yeast: 1 1/2 tsp
Salt: 1 1/2 tsp
Sugar: 1Tbsp
Herbs de provence: 1 tsp
Olive oil: 2 Tbsp
Water: 300 ml approx. (for making the dough)
Warm water : 2 Tbsp

For Filling:
Frozen peas: 400 gms
Fresh mint leaves: handful
Corriander leaves: handful
Green Chillies: 2, chopped finely
Onion: 1, minced
Olive oil: 1 Tbsp
Butter: 2 Tbsp
Pepper: to taste
Salt: to taste
Lemon juice: 2 Tbsp

Mint and Pea Stuffing


How I did it:

  1. Take a large mixing bowl, add the warm water and sprinkle yeast and sugar over it.
  2. Leave aside for 5 mins till it foams.
  3. Add in all the dry ingredients for the dough, and mix well.
  4. Add Olive oil and mix slowly adding water till it forms soft dough.
  5. Lightly oil a vessel, and put the dough in it, and leave it aside for 1 hr, till it raises to double its volume.
  6. In the meanwhile prepare the filling:
  7. Add peas to boiling water to soften them, drain and keep aside.
  8. In a pan, heat butter and olive oil, add onions and cook till soft.
  9. Add the herbs and cook for 2 more mins.
  10. Add in peas in lemon juice, let it cook for couple of mins more.
  11. Season with salt and pepper.
  12. Keep aside to cool and mash the mixture(don't puree)
  13. Keep it aside, for further use.
  14. To make the bread rolls:
  15. Punch down the dough, and take a portion of the dough and spread it on to your palm or on lightly floured platform. Place some stuffing in the center and bring the edges together and seal.
  16. Proceed in the similar way with rest of the dough.
  17. Let rise, covered for 45 minutes.
  18. Now bake in a preheated oven for 40 mins at 200C.
  19. Serve!!


Minty Pea Stuffed Bread Rolls


And the Verdict:

It was not a bad output for the first try. I was afraid experimenting with yeast, but I found it easy to work with.
I must improve a little bit on shaping the bread rolls.
The taste was just perfect, with all the herb flavors and I would love to make them again.

Not satisfied with the shape of the bread, I made these Bread Rolls again, with the left over mint pea stuffing, two days later for breakfast.... and here they are:

Mint Pea Rolls1
Minty Pea Bread Rolls


You can find the post on my improved Bread Rolls here :)

Food Event:
This is my entry for the MBP - Bread event being hosted by Coffee of The Spice Cafe.

And coming to my favorite smell in the kitchen, it is fresh bread or cake baking in the oven... yummm...

Monday 17 September 2007

Pulihora/Puliyogare/Puliyodharai - Tamarind Rice

Pulihora, Chitrannam or Tamarind Rice.. all refer to the same dish, a rice delicacy prepared using tamarind. This is the one dish which is prepared on any festival. It doesnt need a special intro to many South Indians esp., to those from Andra, Karnataka and TamilNadu; though the name and the taste differs slightly from state to state. To Kannadians it is Puliyogare and to Tamilians it is Puliyodharai. It is even served as prasadam in many temples.

Pulihora2
Pulihora


It was so often made during festivals or during outings that my father sometimes used to make fun saying that it is a default menu in our households; for festivals it is pulihora and payasam, and for outings it is pulihora and perugannam(daddojanam).

This is the recipe from my mom, and never goes wrong.

Ingredients:
Rice: 2 cups (uncooked)
Chana Dal: 1/4th cup
Tamarind paste: 2 Tbsp
Green Chillies: 8 (adjust acc. to your taste buds)
Curry Leaves: 2 stalks
Ground Nuts/Cashew Nuts: 1/2 cup
Dry Red Chilles: 5
Hing/Asafoetida: a pinch
Mustard Seeds: 1 tsp
Cumin Seeds: 1tsp
Urad Dal: 2 tsp
Haldi: 1/4 tsp
Oil: 4 Tbsp

How I did it:

  1. Boil Rice, along with Chana dal, adding little salt and oil. Keep aside for further use.
  2. Heat oil in a kadai and add red chilles, urad dal, cashews/groundnuts, mustard seeds and cumin seeds.
  3. Fry on medium heat till seeds splutter.
  4. Add haldi, hing, green chilles, curry leaves. Fry for few more mins.
  5. Add the tamarind paste, and salt. Let is cook for 5 mins.
  6. Take out from heat and mix it with the cooked rice.
  7. Adjust salt, and serve.


Pulihora1
Pulihora


And the Verdict:
Delicious. And perfect for any occasion. This was my favorite from my childhood and still remains the favorite.
It can also be prepared using Lemon or Raw Mango, instead of Tamarind. It depends on an individuals taste buds, as how they like it.
It is a traditional Andra recipe, and a must try for everyone!

Food Event:
This is my entry for the RCI - Karnataka event being hosted by Asha of Foodie's Hope.

Sunday 16 September 2007

Vinayaka Chaturthi

Wish You All Happy Ganesh Chaturthi!!!
Vinayaka Chavithi2
Mushikavaahana modaka hastha,
Chaamara karna vilambitha sutra,
Vaamana rupa maheshwara putra,
Vighna vinaayaka paada namasthe


Ganesh Chaturthi or the birthday of Ganesha (God of Wisdom and Prosperity) falls on the fourth day of the Hindu month of Bhadrapada (around August-September). It is celebrated all across India and is the biggest festival in states like Andhra Pradesh, Maharashtra and TamilNadu.

Vinayaka Chavithi1
Ganesh at our Home


Ganeshji is one of my favorite deities. This is the one festival which I have been performing without fail from my childhood. I used to sort out the books from the subjects which I find tough, to keep near the idol and to write "OM" on them :)
I used to long for the modaks and all the goodies prepared on that day for the "Naivedyam".

Naivedyam
Naivedyam : From top-left clockwise :
Pulihora, Vadapappu Kobbari, Undrallu, Kudumulu, Payasam and Gaarelu


In short this is the festival enjoyed by everyone!!

Tuesday 4 September 2007

Heaven on Earth : Switzerland !!!

Switzerland is truely Heaven on Earth, and it is a must see for everyone, at least once in the lifetime!!!
Some of the pictures I would like to share!!

It was a beautiful experience staying in the apartments surrounded by mountains and clouds....

apartments
The Apartments we rented


"The dying Lion of Lucerne" is one of the world's most famous monuments.
It was carved out of natural rock in memory of the heroic deaths of the Swiss mercenaries at the Tuileries in 1792. Mark Twain described the Lion of Lucerne as the saddest and most moving piece of rock in the world.

apartments
Lucern - The Lion Monument


apartments
Lucern Lake


The entire route to Jungfrau was unimaginably wonderful. It was an engineer marvel to lay tracks with tunnels and stations at around 11,500 feet; the highest railway track in Europe.

apartments
Train Route to JungFrau - Top of Europe


The temperature up on the top was -3C, and is said to be covered with snow all year round!!

apartments
Snow Covered Alps


apartments
Snow Covered Alps


Swiss is known for the scenic beauty of its valleys and mountains.

apartments
Valleys and Mountains


apartments
Valleys and Mountains


Traumbach Falls was an other amazing experience...The water fall is the Glacier water from the 12 Glaciers, and is the only waterfall which is in the mountain caves and is still accessible to tourists!

apartments
Traumbach Falls


A trip to Switzerland is a lifetime experience and cannot be described in words, its just see and feel!!! One can include this in their list of "100 places to see before you die"!!!

Saturday 25 August 2007

Holiday in Swiss

Hello All.... I am off for a holiday in Swiss... and will be back next week.. with loads to share!!!
Till then bbye!!! And Happy Blogging!!!

Tuesday 21 August 2007

Lychee Panacotta with Coconut and Ginger!!

What is Pana cotta?
Pana cotta actually is an Italian dessert made with a cream as a key ingredient, hence the translation of the words which mean "cooked cream." Although not all recipes for panna cotta actually require cooked cream, the traditional recipe makes a light, smooth, eggless custard, flavored with caramel, vanilla or cinnamon.

panacotta2
Lychee Panna cotta with Mango Puree


This version is a little different, which includes Lychees, Coconut cream and Ginger!!!

Ingredients:
Cream : 200 ml
SemiWhipped cream : 200 ml
Coconut Cream : 100 ml
Sugar : 50 gms
Lychees : 100 gms, pureed
Ginger : 1 tsp, grated
Vanilla essence : few drops
Gelatin : 6 leaves

Method:
  1. Soak Gelatin in cold water to soften and keep aside.
  2. Take cream, coconut cream, sugar, ginger in a heavy saucepan and bring to light simmer, just till boiling for 10 mins.
  3. Remove from heat and add the Lychee puree and vanilla.
  4. Squeeze the excess water out of the gelatin and stir into the hot cream.
  5. Allow the cream to cool completely.
  6. Fold in the semi whipped cream and pour the mixture into moulds.
  7. Cover with plastic wrap and refrigerate till fully set.
  8. Serve with Mango Syrup and chopped lychees... errr... mine was actually Mango puree :)
  9. To serve, carefully pass a knife through the edges of the mould, and place the mould in warm water for few mins and then invert on to the serving plate.

panacotta1
Lychee Panna cotta Served with Mango Puree


And the Verdict:
Utterly delicious.. what more can it be when two exotic fruits come together?

Food Event:
This is my entry for the Lychee - AFAM event being hosted by Sig of Live To Eat.

Sunday 19 August 2007

Kadai Paneer and My First Blog awards!!!

I love paneer in any dish. Paneer... the word itself reminds me of all the mouthwatering exotic dishes like Palak Paneer, Paneer Butter Masala, Paneer Burji, Paneer Jalfrizi and finally but not the least Kadai Paneer...
Today I tried to make paneer at home, and was surprised to see that it is very easy and hassel free process... I was excited at the success of my first experiment with homemade paneer...

paneer
Homemade Paneer


Homemade Paneer:
  1. Bring 1 and half liter of whole milk to boil, in a heavy bottomed pan, stirring occasionally to ensure that it does not burn or form skin.
  2. When it just starts boiling, add 3 tbsp of fresh lime juice.
  3. The milk solids start curdling, and cheese separates from whey. If the two are not split completely add two more tablespoons of lime juice.
  4. Strain the mixture through a cheese cloth/ muslin cloth.
  5. Place the cheese cloth bundle on a flat surface. Fold the cloth into a nice round shape, and place a heavy object like a clean brick or a big flat bottomed pan filled with water. This will press down the cheese.
  6. Leave it for a hour or two, and then store the block of cheese in refrigerator. This remains fresh for about 1 week.
Kadai Paneer:

kadaipaneer1
Kadai Paneer


Ingredients:
Paneer Cubes : 1 cup
Capisicum : 2, diced
Tomatoes : 2, de-seeded and diced
Tomato puree : 1 cup
Onions : 2, pureed
Ginger Garlic paste : 1 Tbsp
Turmeric : 1/4 tsp
Cumin powder : 1 tsp
Coriander powder : 1 tsp
Garam Masala : 1 tsp
Red Chili powder : 2 tsp, adjust acc to taste
Salt, to taste
Fresh cream : 2 Tbsp, optional
Kasoori Methi : 1 tsp
Oil : 3 Tbsp
Water : 100 ml

ingredientspaneer
From Left, Capsicum, Tomato and Paneer


Method:
  1. Fry paneer cubes in little oil and keep aside.
  2. Heat oil in a pan, and add onion paste. Fry till the raw smell disappears.
  3. Add ginger garlic paste and fry for few more mins.
  4. Then add turmeric powder, red chili, cumin and coriander powder. Stir.
  5. Add in tomato puree and salt. Add water. Cover and bring to boil.
  6. Add capsicum and tomato, and cook covered for 5 mins.
  7. Add garam masala, cook till the veggies are done.
  8. Finally add paneer cubes and cook for 5 more mins.
  9. Add kasoori methi and fresh cream.
  10. Serve hot with Rotis or naans.

kadaipaneer2
Kadai Paneer with Rotis


And the Verdict:
J ended up licking his fingers.. so need not say more :)

And Finally The Awards:


The Power of Schmooze Award is for bloggers who “effortlessly weave their way in and out of the blogosphere, leaving friendly trails and smiles, happily making new friends along the way. They don’t limit their visits to only the rich and successful, but spend some time to say hello to new blogs as well. They are the ones who engage others in meaningful conversations, refusing to let it end at a mere hello - all the while fostering a sense of closeness and friendship.“

The Rocking Girl Blogger Award is for bloggers who “are girls or women who blog and who Rock!!!“


I am very glad to say that, we (my blog and me) have been awarded, The Rocking Girl Blogger by Padma of Padma's Kitchen and Archana of Love2EatHate2Cook and a Schoomze Award again by Archana and Laavanya of CookeryCorner !!!!!! Is'nt that nice... it has been only 3 months I have started blogging and receiving these awards, gave me a new inspiration!!!
Thank You Girls!!! And thank you all for all the comments, suggestions and motivation!!!! The main credit goes to my blog readers :)

Now I need to pass on these awards, its OK if you have been already nominated. This is a simple gesture to say that you are loved :)

Cynthia of Tastes Like Home
Viji of Vcusine
SriValli of Cooking 4 All Seasons
Kamini of The Bubbling Cauldron
Meeta of Whats for Lunch Honey
Coffee of The Spice Cafe

Keep up the Spirit and Keep Going girls!!!